BitRaser Virtual Machine Eraser
 3. Getting Started
BitRaser Virtual Machine Eraser / 4. How to / 4.1. Erase Virtual Machine
4.1. Erase Virtual Machine
BitRaser Virtual Machine Eraser is an effective software for erasing virtual machines, linked storage and configuration files securely. The erased VMs, linked storage and configuration files are permanently deleted and impossible to recover.
Steps to Erase Virtual Machine
-
Run BitRaser Virtual Machine Eraser.
-
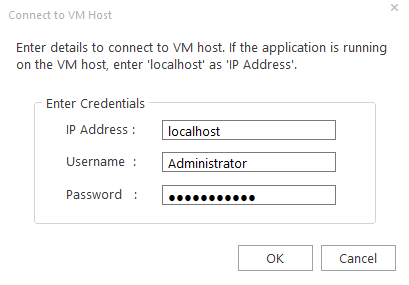
The Connect to VM Host dialog box pops up, as shown below:
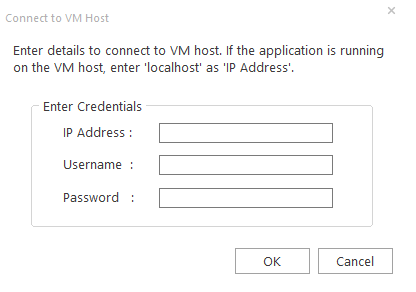
- In the Connect to VM Host dialog box, under Enter Credentials section, enter the VM host details.
-
IP Address: Enter the IP Address of your VM host.
Note: If the application is running on the VM Host, use " localhost" as the IP Address or if the application is running on a remote machine, use the actual IP address of that machine instead of "localhost" to connect to it.
-
Username: Enter the Username of your VM Host.
-
Password: Enter the Password of your VM Host.
Note: You can also connect to the VM host and different VM host by clicking on the  icon in the menu ribbon.
-
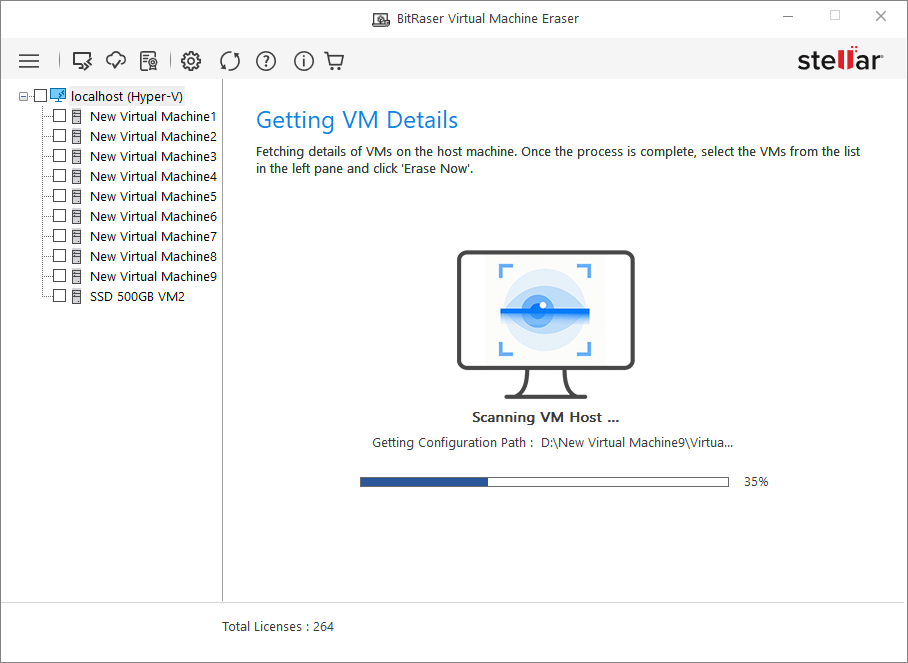
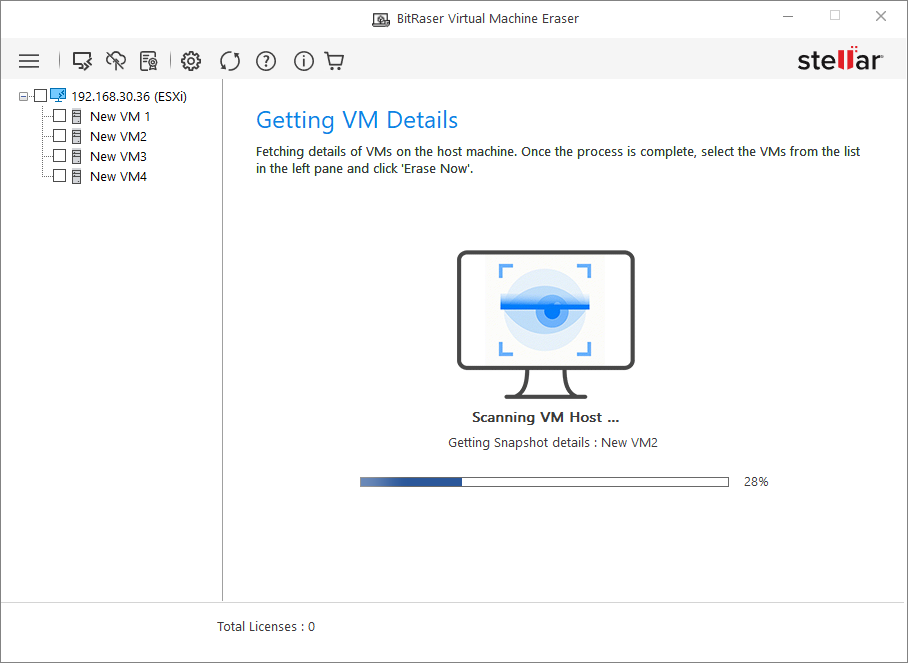
Click OK. You will be redirected to the Getting VM Details window.
-
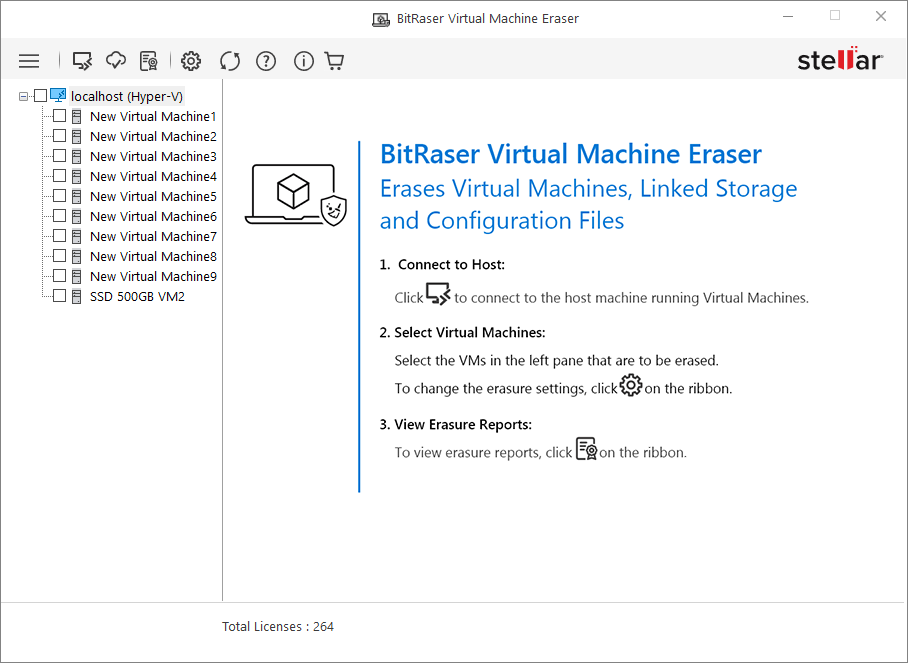
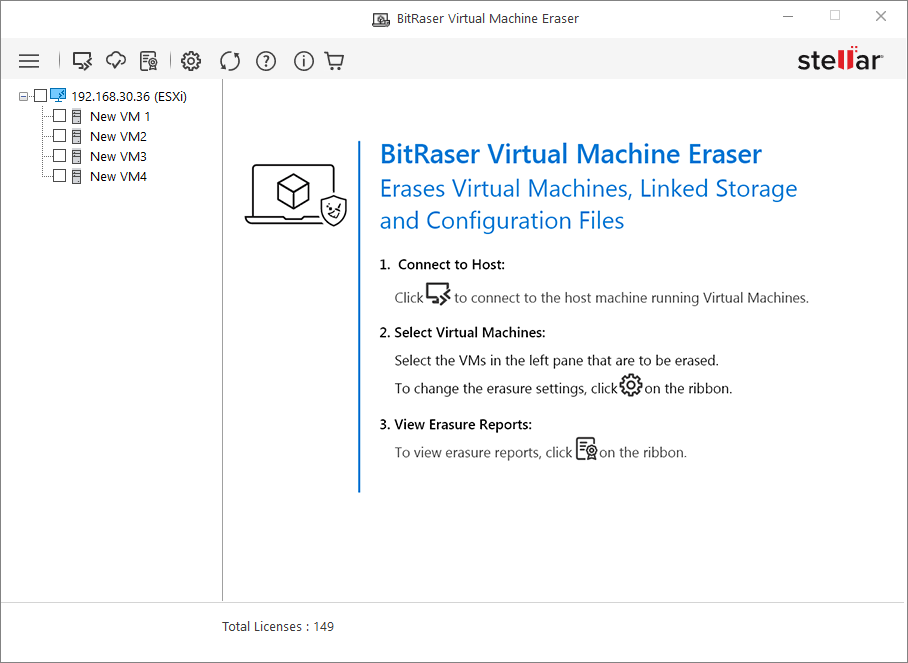
In the Getting VM Details window, the application fetches the details of the all virtual machine(s) on the host machine and displays them in the left pane, as shown in the image below:
For Hyper-V
For ESXi
Note:
If the following requirements are not fulfilled then the application will pop up the Credentials dialog box with the following messages which are given below:
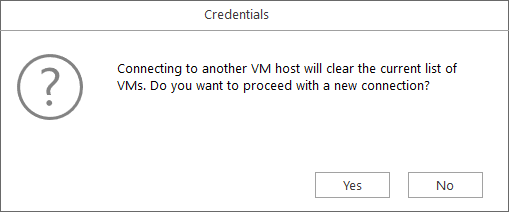
- If you connect to another VM host, the current list of VMs will be cleared. To connect to the new connection, click Yes in the Credentials dialog box.
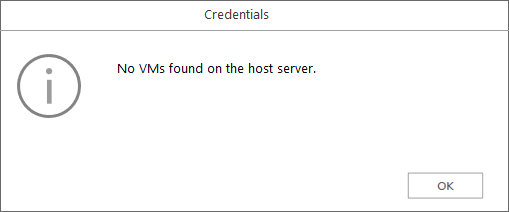
- If no VM is found on the VM host, a "No VMs found on the host server" message is displayed.
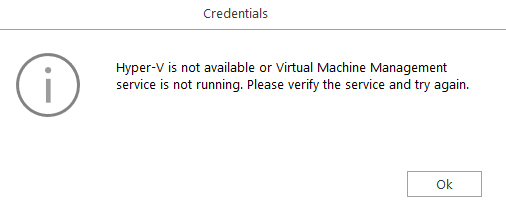
- If the Hyper-V and ESXi host are not available or the Virtual management service is not running on your machine, then verify the service and try again.
- Once the fetching process is complete, the main interface of the BitRaser Virtual Machine Eraser will display including fetched VMs in the left pane.
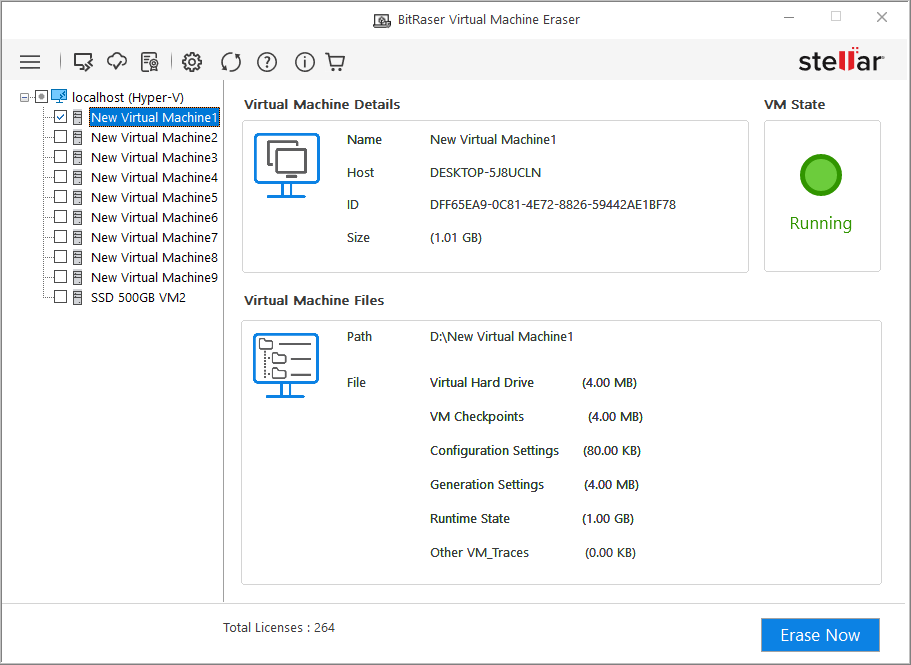
For Hyper-V
For ESXi
-
From the list of VM(s) in the left pane, select the VM(s) you want to erase.
-
When you select the VM(s) from the left pane, the information about the virtual machine(s) will be displayed on the screen which are given below:
-
Virtual Machine Details: Displays the details such as name of the virtual machine, host, ID and size of the virtual machine
-
VM state: Displays the virtual machine state such as Running, Off etc.
-
Virtual Machine Files: Displays the information such as path and files with their respective sizes.
-
Click the Erase Now button.
-
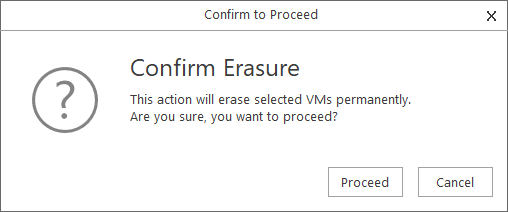
A Confirm to Proceed dialog box pops up with the message "This action will erase selected VMs permanently. Are you sure, you want to proceed?".
-
Click on the Proceed button to proceed with the erasure process.
-
The Erasing Virtual Machines progress bar window will be displayed on the screen.

-
The Process Completed window will appear on the screen, displaying an Erasure Summary that includes details such as the serial number, name of the erased files, total size of the erased files, number of files erased, and the status of the erased files.
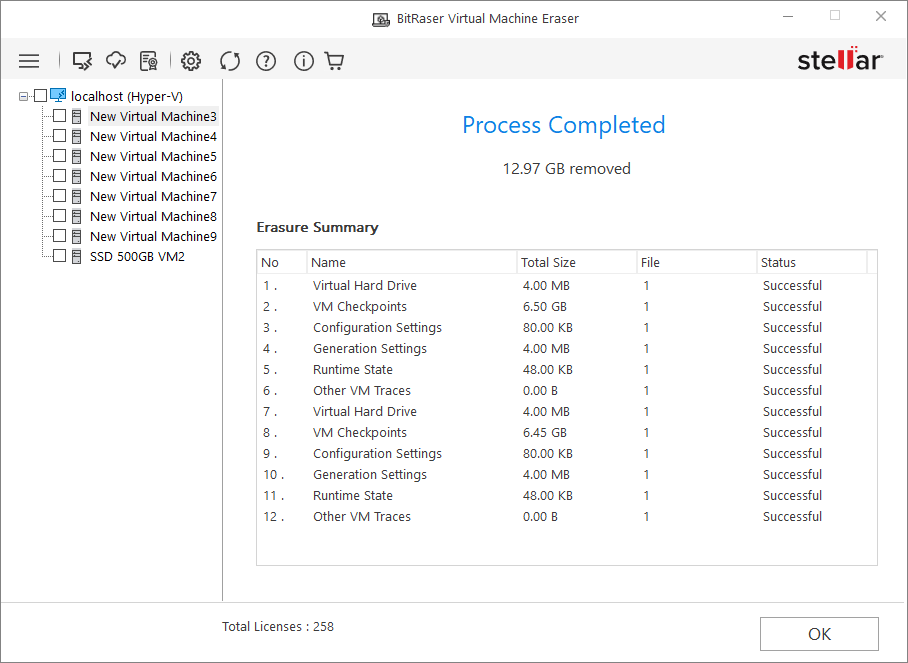
- Click OK.