BitRaser File Eraser for Linux is a file wiping software that helps you permanently erase files on different Linux operating systems, including Ubuntu, RedHat, and CentOS. Using the software, you can wipe files, folders, free space, internet activity, and application traces beyond the scope of data recovery.
This knowledge base guides you on how to use BitRaser File Eraser for Linux to wipe files, schedule erasure tasks, and maintain erasure reports to attain compliance. Data protection laws such as the EU-GDPR, CCPA, and HIPAA emphasize data minimization and provide individuals with the 'right to erasure.' As a result, organizations are obligated to securely wipe data files to ensure compliance with these regulations.
Step 1: Click on the app launcher icon on the bottom left and type ‘t’ in the search bar to go to terminal. Click ‘Terminal.‘ (Refer to Image 1)
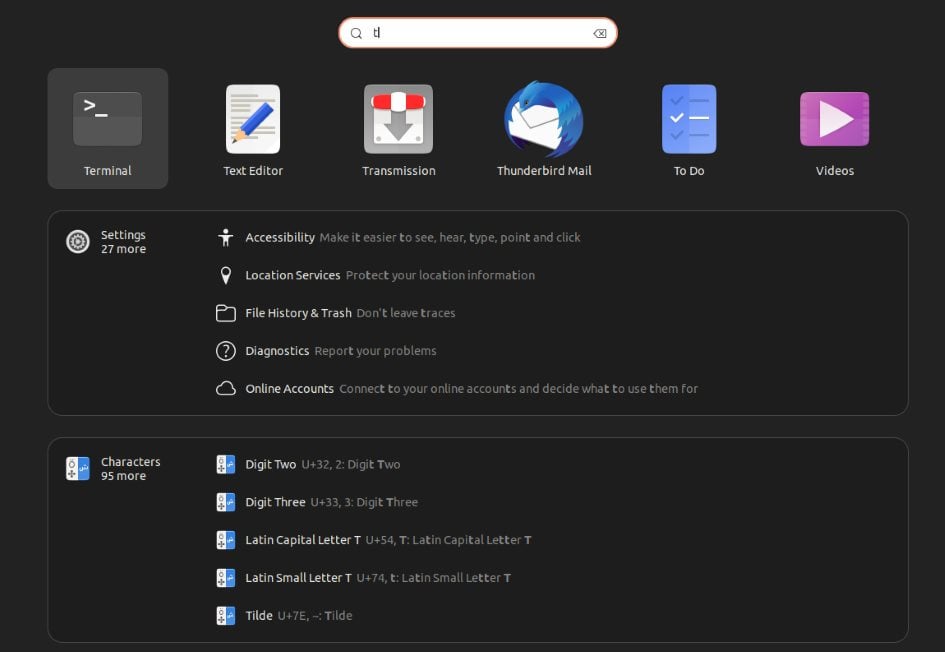
Image 1: Search for Terminal in the Apps
Step 2: Inititate BitRaser File Eraser for Linux
- For Ubuntu: Type “sudo apt install ” and drag & drop the .deb package for BitRaser File Eraser. Press Enter. (Refer to Images 2, 3, and 4)
- For RedHat and CentOS: Type “sudo dnf install ” and drag & drop the .rpm package for BitRaser File Eraser. Press Enter.
Note: After typing the command, remember leaving a space before dragging & dropping the BitRaser package.
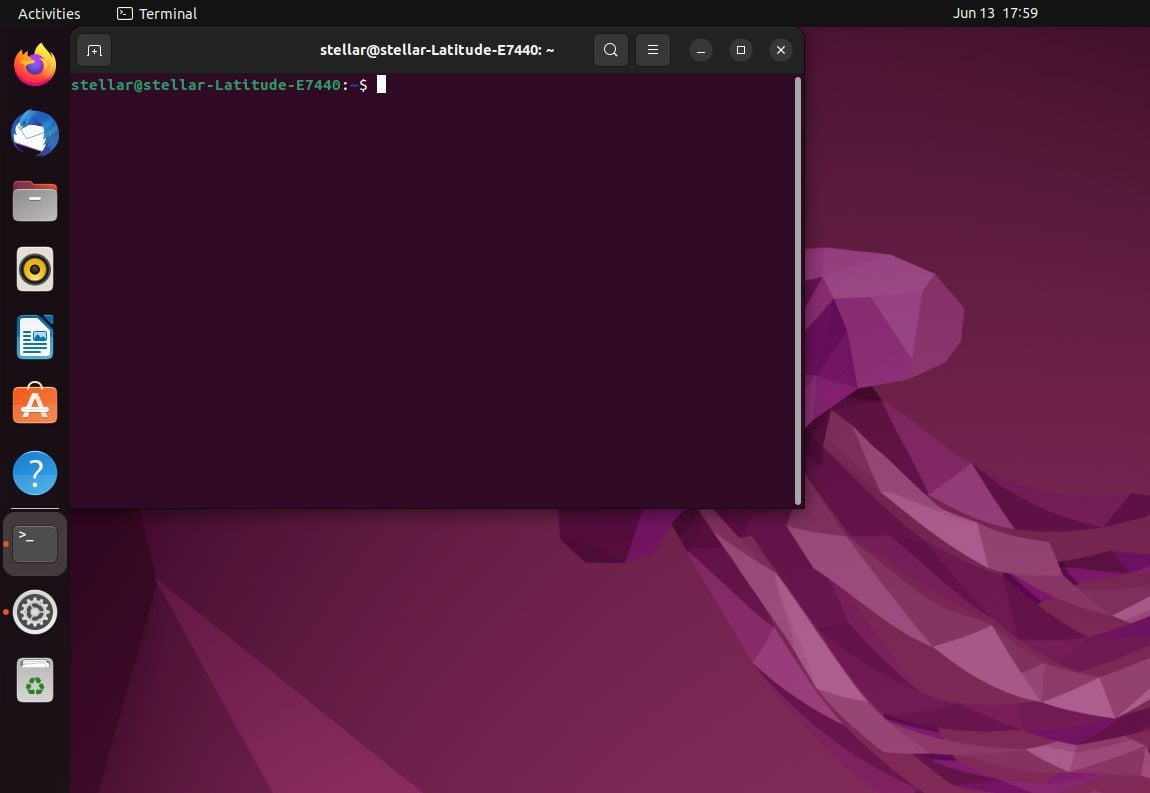
Image 2: Terminal Window is Now Open
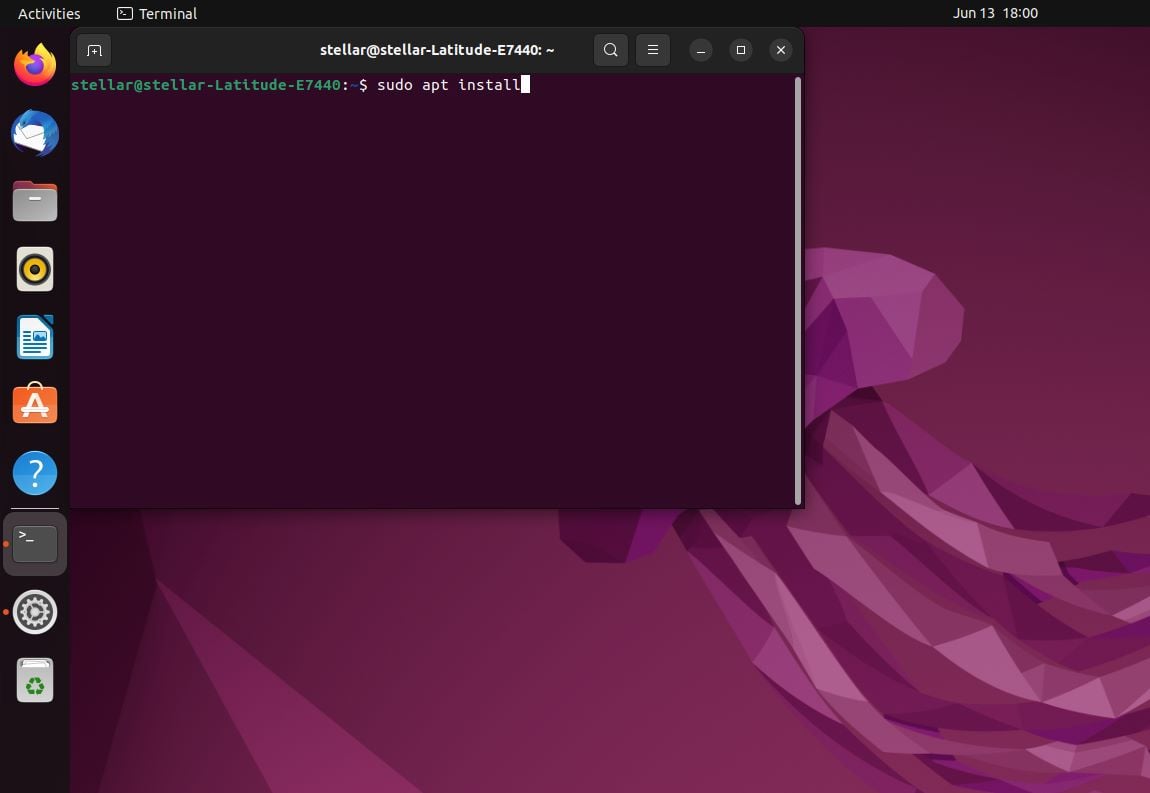
Image 3: Type the Command on the Terminal Window
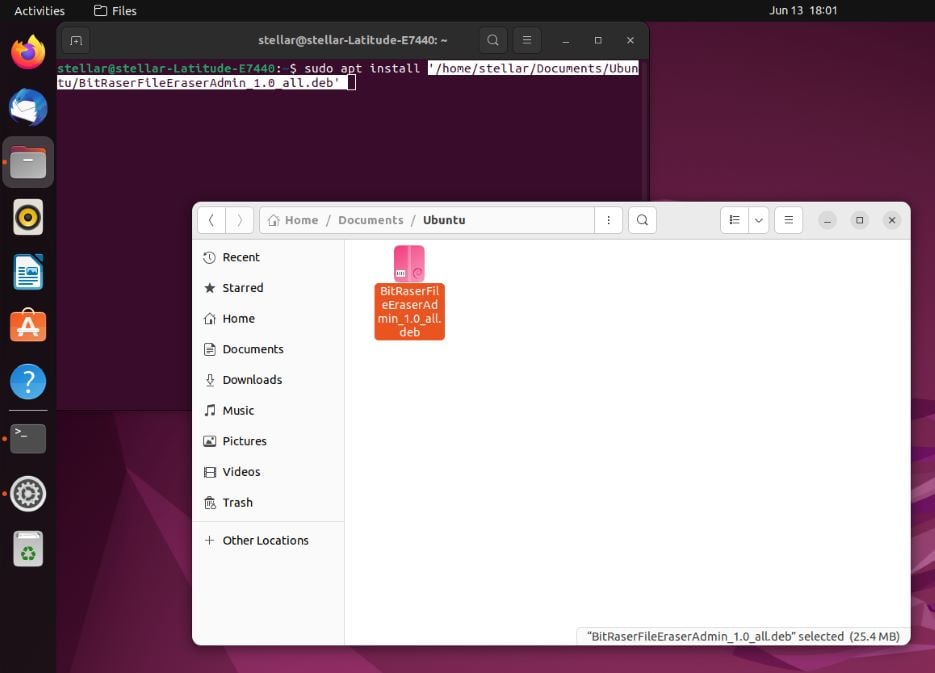
Image 4: Drag and Drop the Ubuntu Package for BitRaser File Eraser
Step 3: Enter the system password when prompted by the window. (Refer to Images 5 and 6)
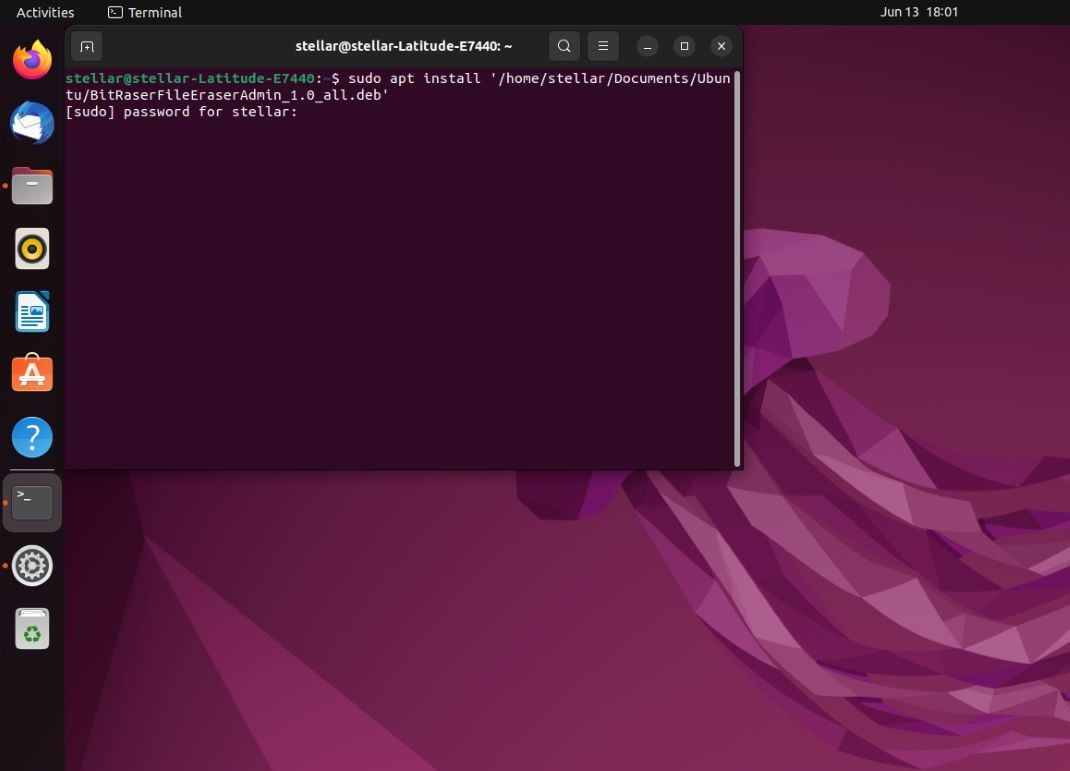
Image 5: Enter the Password of Your System
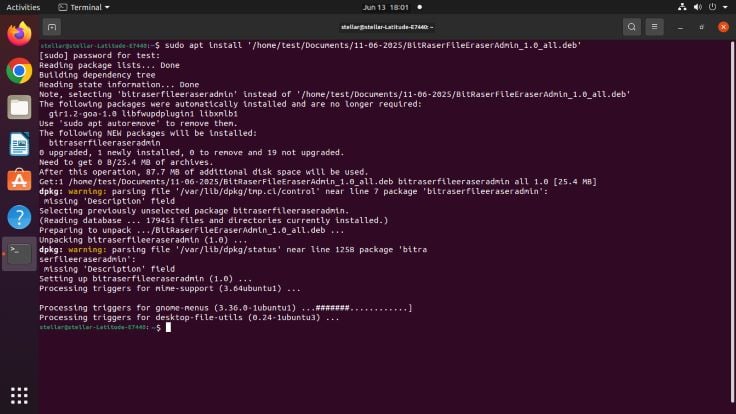
Image 6: BitRaser File Eraser for Linux Installation Completes
BitRaser File Eraser for Linux has now been installed on your system.
Step 4: Click on the app launcher, search for BitRaser File Eraser for Linux, and double-click on it to launch it. (Refer to Image 7)
Image 7: BitRaser File Eraser for Linux Icon in the Apps
Step 5: Enter your system password and click ‘OK’ to proceed when prompted by the BitRaser File Eraser for Linux dialog box. (Refer to Image 8)
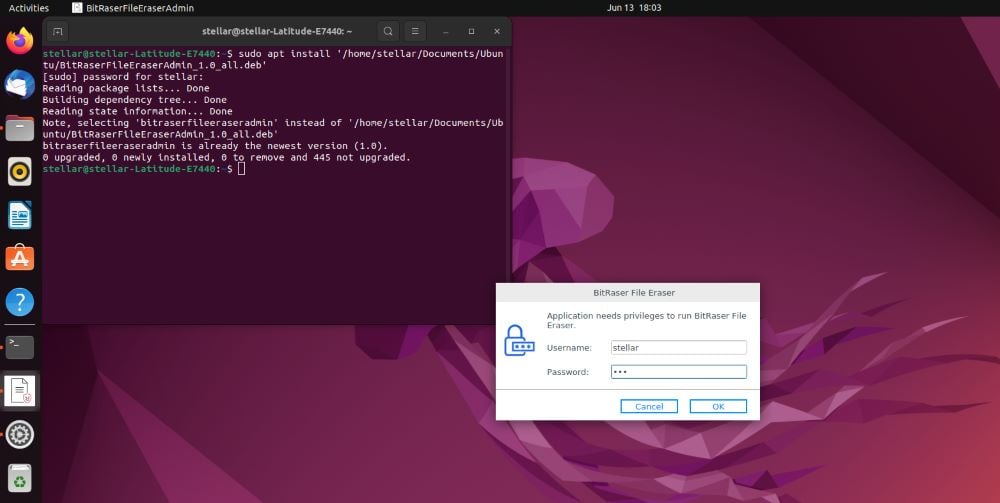
Image 8: System Password Entered
Step 6: Click on ‘I Agree’ after reading the End User License Agreement. (Refer to Image 9)
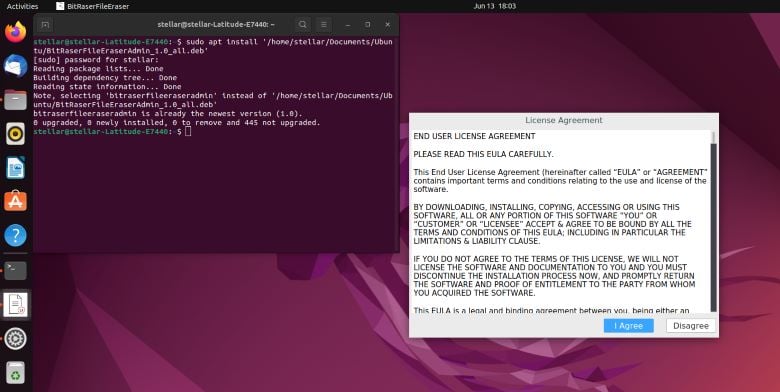
Image 9: The Dialog Box with EULA Opens
The main dashboard for BitRaser File Eraser for Linux is now open. (Refer to Image 10)

Image 10: BitRaser File Eraser for Linux Dashboard
Step 7: Click on 'Files & Folders' to open the file eraser module, then click on the cloud icon. Enter the user ID and password of your BitRaser Cloud account, and click on ‘Login.’ (Refer to Images 11 & 12)

Image 11: Enter Credentials for BitRaser Cloud Account

Image 12: Connection to BitRaser Cloud Account Established
The status will show “Connected” in green, and a dialog box will appear notifying you that you have successfully logged in to your cloud account upon successful connection to the BitRaser server. If you have already bought the BitRaser File Eraser licenses, then you can proceed with the erasure. Otherwise, at every attempt to erase an item, a dialog box will open prompting you to click on ‘Buy Now’ to purchase the licenses.
Step 8: Click on the icon of Settings in the top bar. Under ‘General,’ select an erasure algorithm of your choice.
Step 9: Click on either ‘Drag & Drop’ or ‘Search & Erase’ the items you wish to erase. (Refer to Image 13)

Image 13: Select Files for Erasure
Step 10: Click on 'Erase Now' to erase the selected files. Once the files have been erased, you can similarly use the other options to wipe Free Space, Traces, and Volume. (Refer to Images 14, 15 & 16).

Image 14: Erase Free Space
The application provides an option to erase internet activity, application & system traces include bash history, cache, trash, saved login, bookmarks, cookies, system logs, etc.

Image 15: Erase Traces

Image 16: Erase Volume
At each erasure attempt, a Confirm Erasure dialog box will appear. Proceed only if you want the selected data to be erased permanently. After the erasure process is complete, you will be notified of the successful completion along with the presentation of an erasure summary.
Schedule Erasure: The software provides you with the option to 'Schedule Erasure’ to automate the erasure of files, folders, and traces at periodic intervals. Select erasure frequency and time of start. Enter and save the password for the scheduled new or existing tasks to function uninterruptedly. Browse and select at least one item to schedule file & folder erasure. (Refer to Images 17 and 18)

Image 17: Scheduling the Erasure of Traces

Image 18: Scheduling File Erasure
The software provides an option via 'Settings' to change the default erasure standard, and also create an ignore file list, comprising important files that shouldn't be erased. (Refer to Images 19 & 20)

Image 19: General Settings

Image 20: Ignore File List
Post erasure, reports can be seen under the 'Reports' tab on the left panel, and the same is uploaded automatically to the BitRaser Cloud Console if the application is already connected to the BitRaser Console. In case the connection was not established earlier, then post erasure report can be uploaded on BitRaser Cloud by clicking on the upload button. (Refer to Images 21 & 22)

Image 21: Reports Tab

Image 22: BitRaser File Eraser Linux Report


