Step 1: Log in to BitRaser Cloud Console using the login credentials received via email post-purchase. (Refer to Image 1)
Image 1: BitRaser New Cloud Console Log-in Screen
Step 2: Click 'Customize ISO' on the left panel and then click on ‘Create Custom ISO’. Here, you will get the option to customize different variants of BitRaser Drive Eraser ISO. (Refer to Image 2)
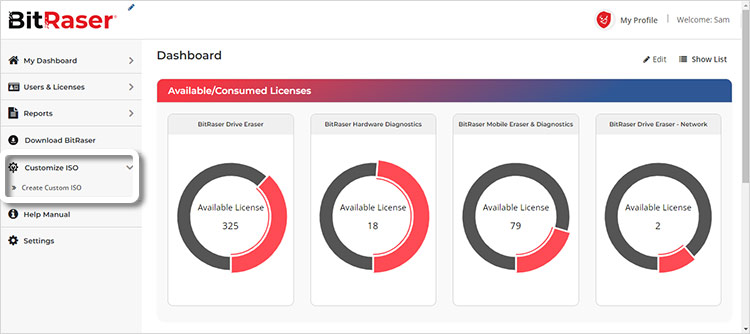
Image 2: Click on Create Custom ISO
Step 3: You must again enter your password to begin the ISO customization process. Enter your password, then click 'Continue'. (Refer to Image 3)
Image 3: Re-enter Password to Customize BitRaser ISO
Step 4: You must choose the version of the BitRaser Drive Eraser ISO that you want to customize. For this KB, we will be customizing the latest version, i.e. BitRaser Drive Eraser v3.0.0.8. Select the ISO file and then click on the ‘Customize’ button. (Refer to Image 4)

Image 4: Select BitRaser Drive Eraser Version to Customize
Step 5: Now, choose the BitRaser Drive Eraser variant that you want to customize – BitRaser Cloud, Network Cloud, or Offline variant. To learn more about the different variants of BitRaser Drive Eraser, you can read our blog.
For this KB, we will customize the BitRaser Cloud variant ISO.
Once you have chosen the variant, click 'Next' to begin customization. (Refer to Image 5)
Note: You can save up to three ISO files simultaneously in the cloud console that can be downloaded later. If you want to create a new Customized ISO and already have three saved, then you will have to delete one before making a new Customized ISO.
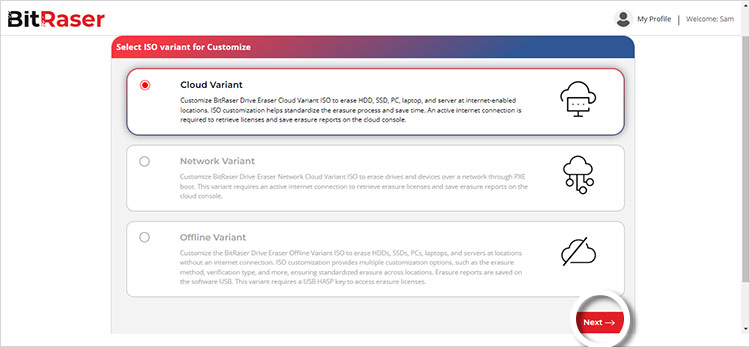
Image 5: Choose the BitRaser Variant ISO to Customize
Step 5: Follow the process to configure the ISO as desired. It allows you to pre-configure many data fields and functions. Let us see all the options that you can customize.
- The first option is 'General' which allows you to customize the following: (Refer to Image 6)
- Keyboard Layout: You can choose the keyboard layout according to your requirements and can choose from English-us, French-fr, Italian-it, etc.
- Eject CD on Boot: Choose 'Yes' if you want the bootable CD to eject after the device boots with BitRaser.
- Hardware Diagnostics: Enable this option to allow the software to do hardware diagnostics. The report will contain the status of hardware components like motherboard, processor, memory, keyboard, battery, Wi-Fi, etc.
- Enable Screensaver: Checking this option will enable BitRaser screensaver and the time after it appears during the erasure process. It will display the erasure progress on the screen.
- Write FingerPrint: The application will write a fingerprint at the sector level of the drive to verify that the drive was erased using BitRaser Drive Eraser. You can specify the sector on which you want the fingerprint. You can verify the fingerprint through the 'Hex-Viewer' in the BitRaser application.
- Enable Disk Smart Size: Using this option, you can round off the actual drive size to the nearest market standard drive size to resell the drive in the marketplace.
- Show Restart Button: This option will show the 'Restart Button' in the BitRaser Drive Eraser main interface.
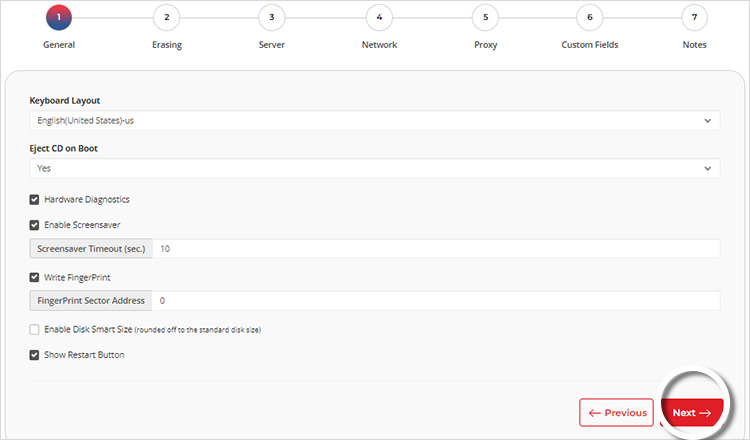
Image 6: Customize BitRaser ISO General Tab
Once done, click the 'Next' button to go to the 'Erasing' tab. (Refer to Image 7a & 7b)
- Erasing tab allows you to customize the following:
- Erasure Method: You can choose from 26 globally recognized erasure methods like NIST Clear, NIST Purge, US DoD 5220.22, and HMG IS 5 to make it the default erasure standard per your client's needs. This ensures that all drives are wiped using your customer-preferred data erasure standard.
- Verification: You can choose to freeze the erasure verification method so that all drives wiped using this ISO follow a standardized verification method. The software allows you to choose from 'No Verification,' 'Random Verification,' or 'Total Verification.'
Please note if the US DoD or NIST Purge standard is chosen, the verification type is fixed as Total Verification.

Image 7a: Erasing Tab BitRaser ISO Customization
- Enforce method on SSDs: You may check this option and select the method that you want to use for wiping SSDs. This option comes in handy when wiping hard drives & SSDs together in a chassis. You might have chosen the DoD standard as default; however, if you enforce the NIST Purge standard while customizing ISO, then the software will wipe SSDs using NIST Purge and other drives like SATA and PATA using the DoD standard.
- Auto Select All Drives to Erase: You may check this option if you want the software to select all internal and external drives for erasure automatically.
- Auto Erase: Select this option to perform auto erasure without having to click the 'Erase' button in the software. The software will start erasing drives as soon as it has connected to the internet and has acquired erasure licenses from the cloud server.
- Freeze Erasure Method & Verification: Selecting this option will freeze the erasure method and verification type for the ISO being created. It helps ensure standardization across physically spread-out locations to maintain consistency in the erasure method and verification process and to ensure regulatory compliance.
- Enable RAID Dismantling: Checking this option enables the software to automatically detect and dismantle RAID configuration in servers. The software supports RAID dismantling for select controllers like LSI, Adaptec, and Dell PERC.
- Remove HPA/DCO Automatically: This option will enable the software to detect and erase hidden areas like HPA and DCO.
- Erase Remapped Sectors: Select this option if you want the software to erase remapped sectors automatically.
- Shutdown Machine after Erasure: Checking this option will automatically shut down the system once the erasure process is over.
- Sync Report On Cloud During Erasure Process: If you select this option, the erasure progress on the application will be synced with the BitRaser Cloud Console, ensuring that the erasure report is updated in real time on the cloud.
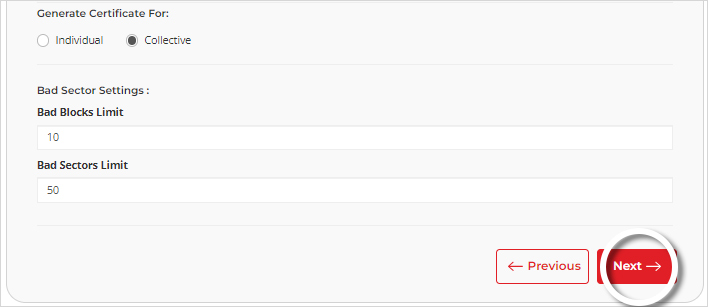
Image 7b: Erasing Tab BitRaser ISO Customization
- Generate Certificate: You can generate a single or a collective certificate for all the drives you wiped.
- Bad Sector Settings: You can set a threshold for the number of bad blocks and sectors in the disk. The erasure process will stop automatically if the bad block/sector number exceeds your threshold. This way, the drives with bad sectors can be segregated without spending time on the wiping process.
- Click the 'Next' button to go to the 'Server' tab. (Refer to Image 8)
- The Server tab allows you to save your BitRaser Cloud console credentials in the ISO. It saves valuable time, as the technician does not have to enter these details for each erasure.
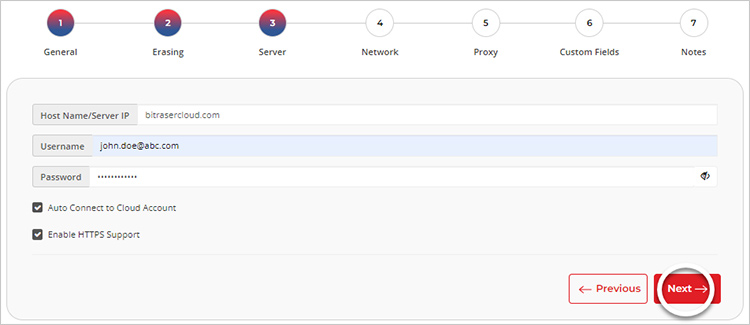
Image 8: Server Tab BitRaser ISO Customization
-
- Auto Connect to Cloud Account: This option automatically connects the software with the BitRaser cloud console. This saves time and reduces the number of clicks a technician makes for each erasure.
- Enable HTTPS Support: Checking this option will enable HTTPS support for communication with the BitRaser Cloud Console.
- Click 'Next' to go to the 'Network' tab. This section helps you pre-select your desired network connection. The option selected by default is 'DHCP'.
- Wireless: By selecting the wireless option, you can save the 'SSID Name' and 'Password,' eliminating the need to input these values repeatedly for every erasure. It helps streamline the erasure process by saving time and unnecessary clicks. (Refer to Image 9)
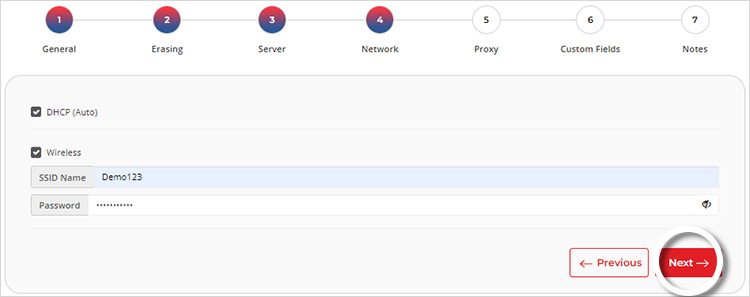
Image 9: Network Tab BitRaser ISO Customization
- Click 'Next' to go to the ‘Proxy’ tab. You can enable the Proxy and save its details on the ISO, so you do not have to reenter it with each erasure. (Refer to Image 10)
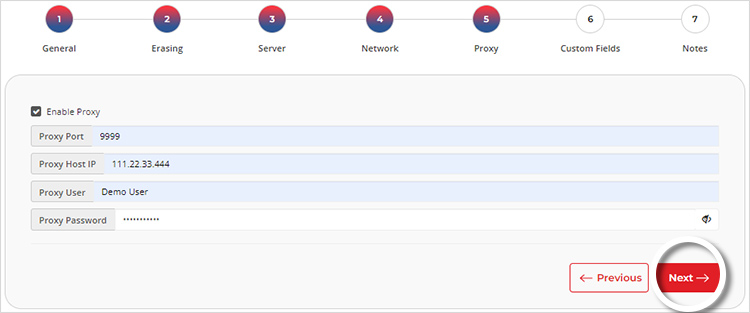
Image 10: Proxy Tab BitRaser ISO Customization
- Click on the 'Next' button to go to the 'Custom Fields' tab; there are two options here.
- Enter Erasure Details: It provides you the option to enter the customer and the technician/validator details.
- Customer Details: You can add customer details like name and location along with media details like the source and destination of the media device in the erasure report.
- Technician/Validator Details: The erasure reports and certificates will show the name of the technician who performs the erasure and the validator who validates the erasure. (Refer to Image 11a)
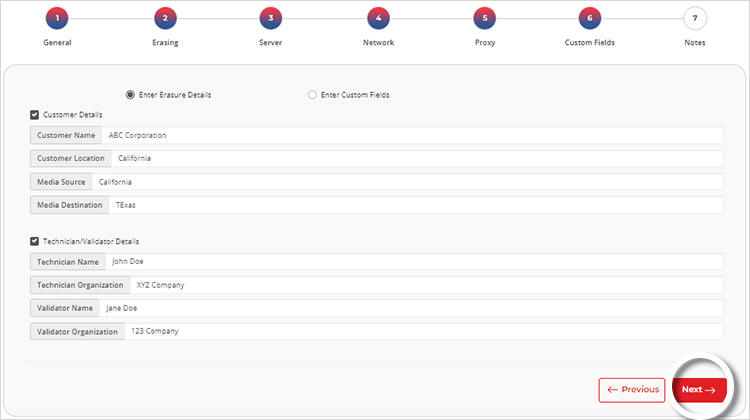
Image 11a: Custom Fields Erasure Details Tab BitRaser ISO Customization
- Enter Custom Fields: The tab helps define default custom fields to capture required values for each erased device. The custom fields are reflected in the Erasure Reports. You can customize up to 20 fields using ISO customization. (Refer to Image 11b)
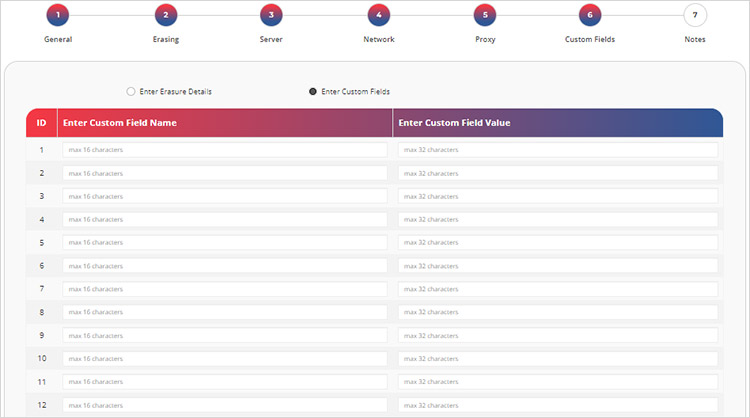
Image 11b: Custom Fields Enter Field Value Tab BitRaser ISO Customization
- Click 'Next' to save the custom fields and move to the 'Notes' tab to describe any further comments or notes about the present ISO configuration settings. (Refer to Image 12)
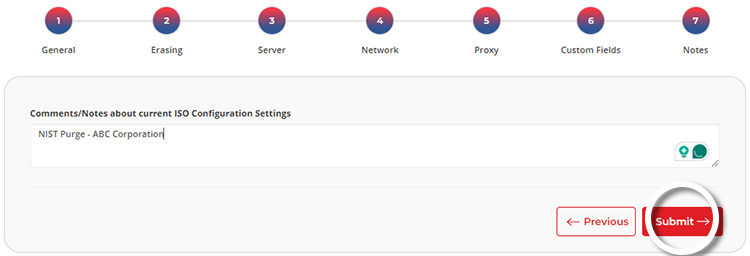
Image 12: Notes Tab BitRaser ISO Customization
You may also click 'Previous' to check or edit previous settings. Otherwise, click on 'Submit' to kick-start the ISO creation process.
A 'Please Wait' message will flash on your screen while ISO customization is processed. Once done, download the ISO and write it to the USB using freely available software like Rufus.
You can now see your newly customized ISO under the 'Customized ISO' tab in the 'BitRaser ISO Dashboard'. Check the date it was customized and start wiping your drives and devices. (Refer to Image 13)
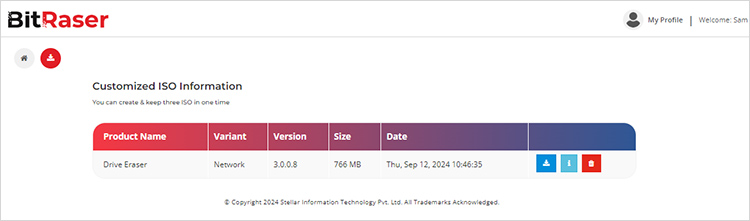
Image 13: Customized ISO Information Screen


