The Apple M1 is a family of ARM-based systems-on-a-chip (SoCs) built by Apple Inc. Apple’s CPU and graphics processing unit (GPU) have transitioned from Intel to Apple silicon chips for its Mac desktops, laptops (MacBook Air, MacBook Pro, Mac Mini, Mac Studio, Mac Pro), as well as its tablets. The built-in Apple M1 processor allows file-level encryption, automated data encryption, and password protection, giving the Mac the same robust security features as the iPhone.
Now, let us see how to erase Mac devices with an M1 chip via the 'Terminal'.
Step 1: Press the ‘Power’ button till the time you see the ‘Options’ menu on your screen. Select Options and then click on ‘Continue’ to go to the Mac recovery screen. (Refer to Image 1)
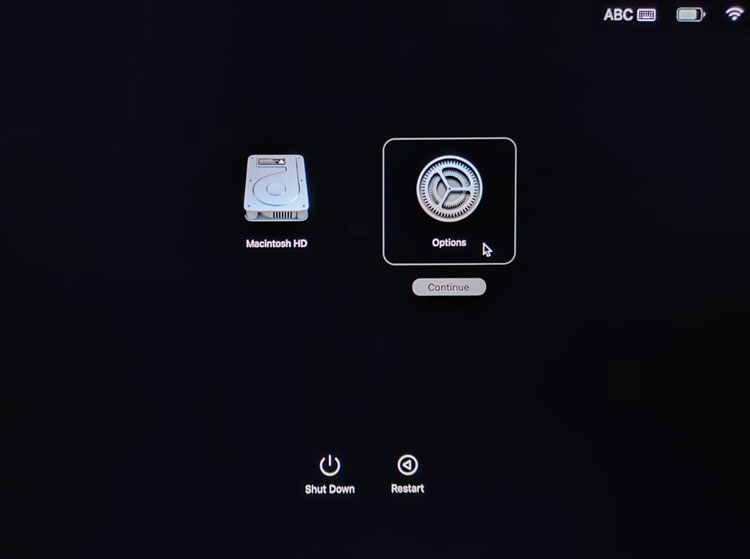
Image 1: Select Options, then Click Continue
Step 2: In the Mac Recovery screen. Go to ‘Utilities > Terminal’. (Refer to Image 2)

Image 2: In the Mac Recovery Screen, go to Utilities and Select Terminal
Step 3: In the terminal window, type the following command. There is a space between sh & < (Refer to Image below).
sh <(curl https://bdm1.co/m.xml) and then press the ‘return’ key. (Refer to Image 3)
Important: For older Mac devices before 2015, replace HTTPS with HTTP in the above command.
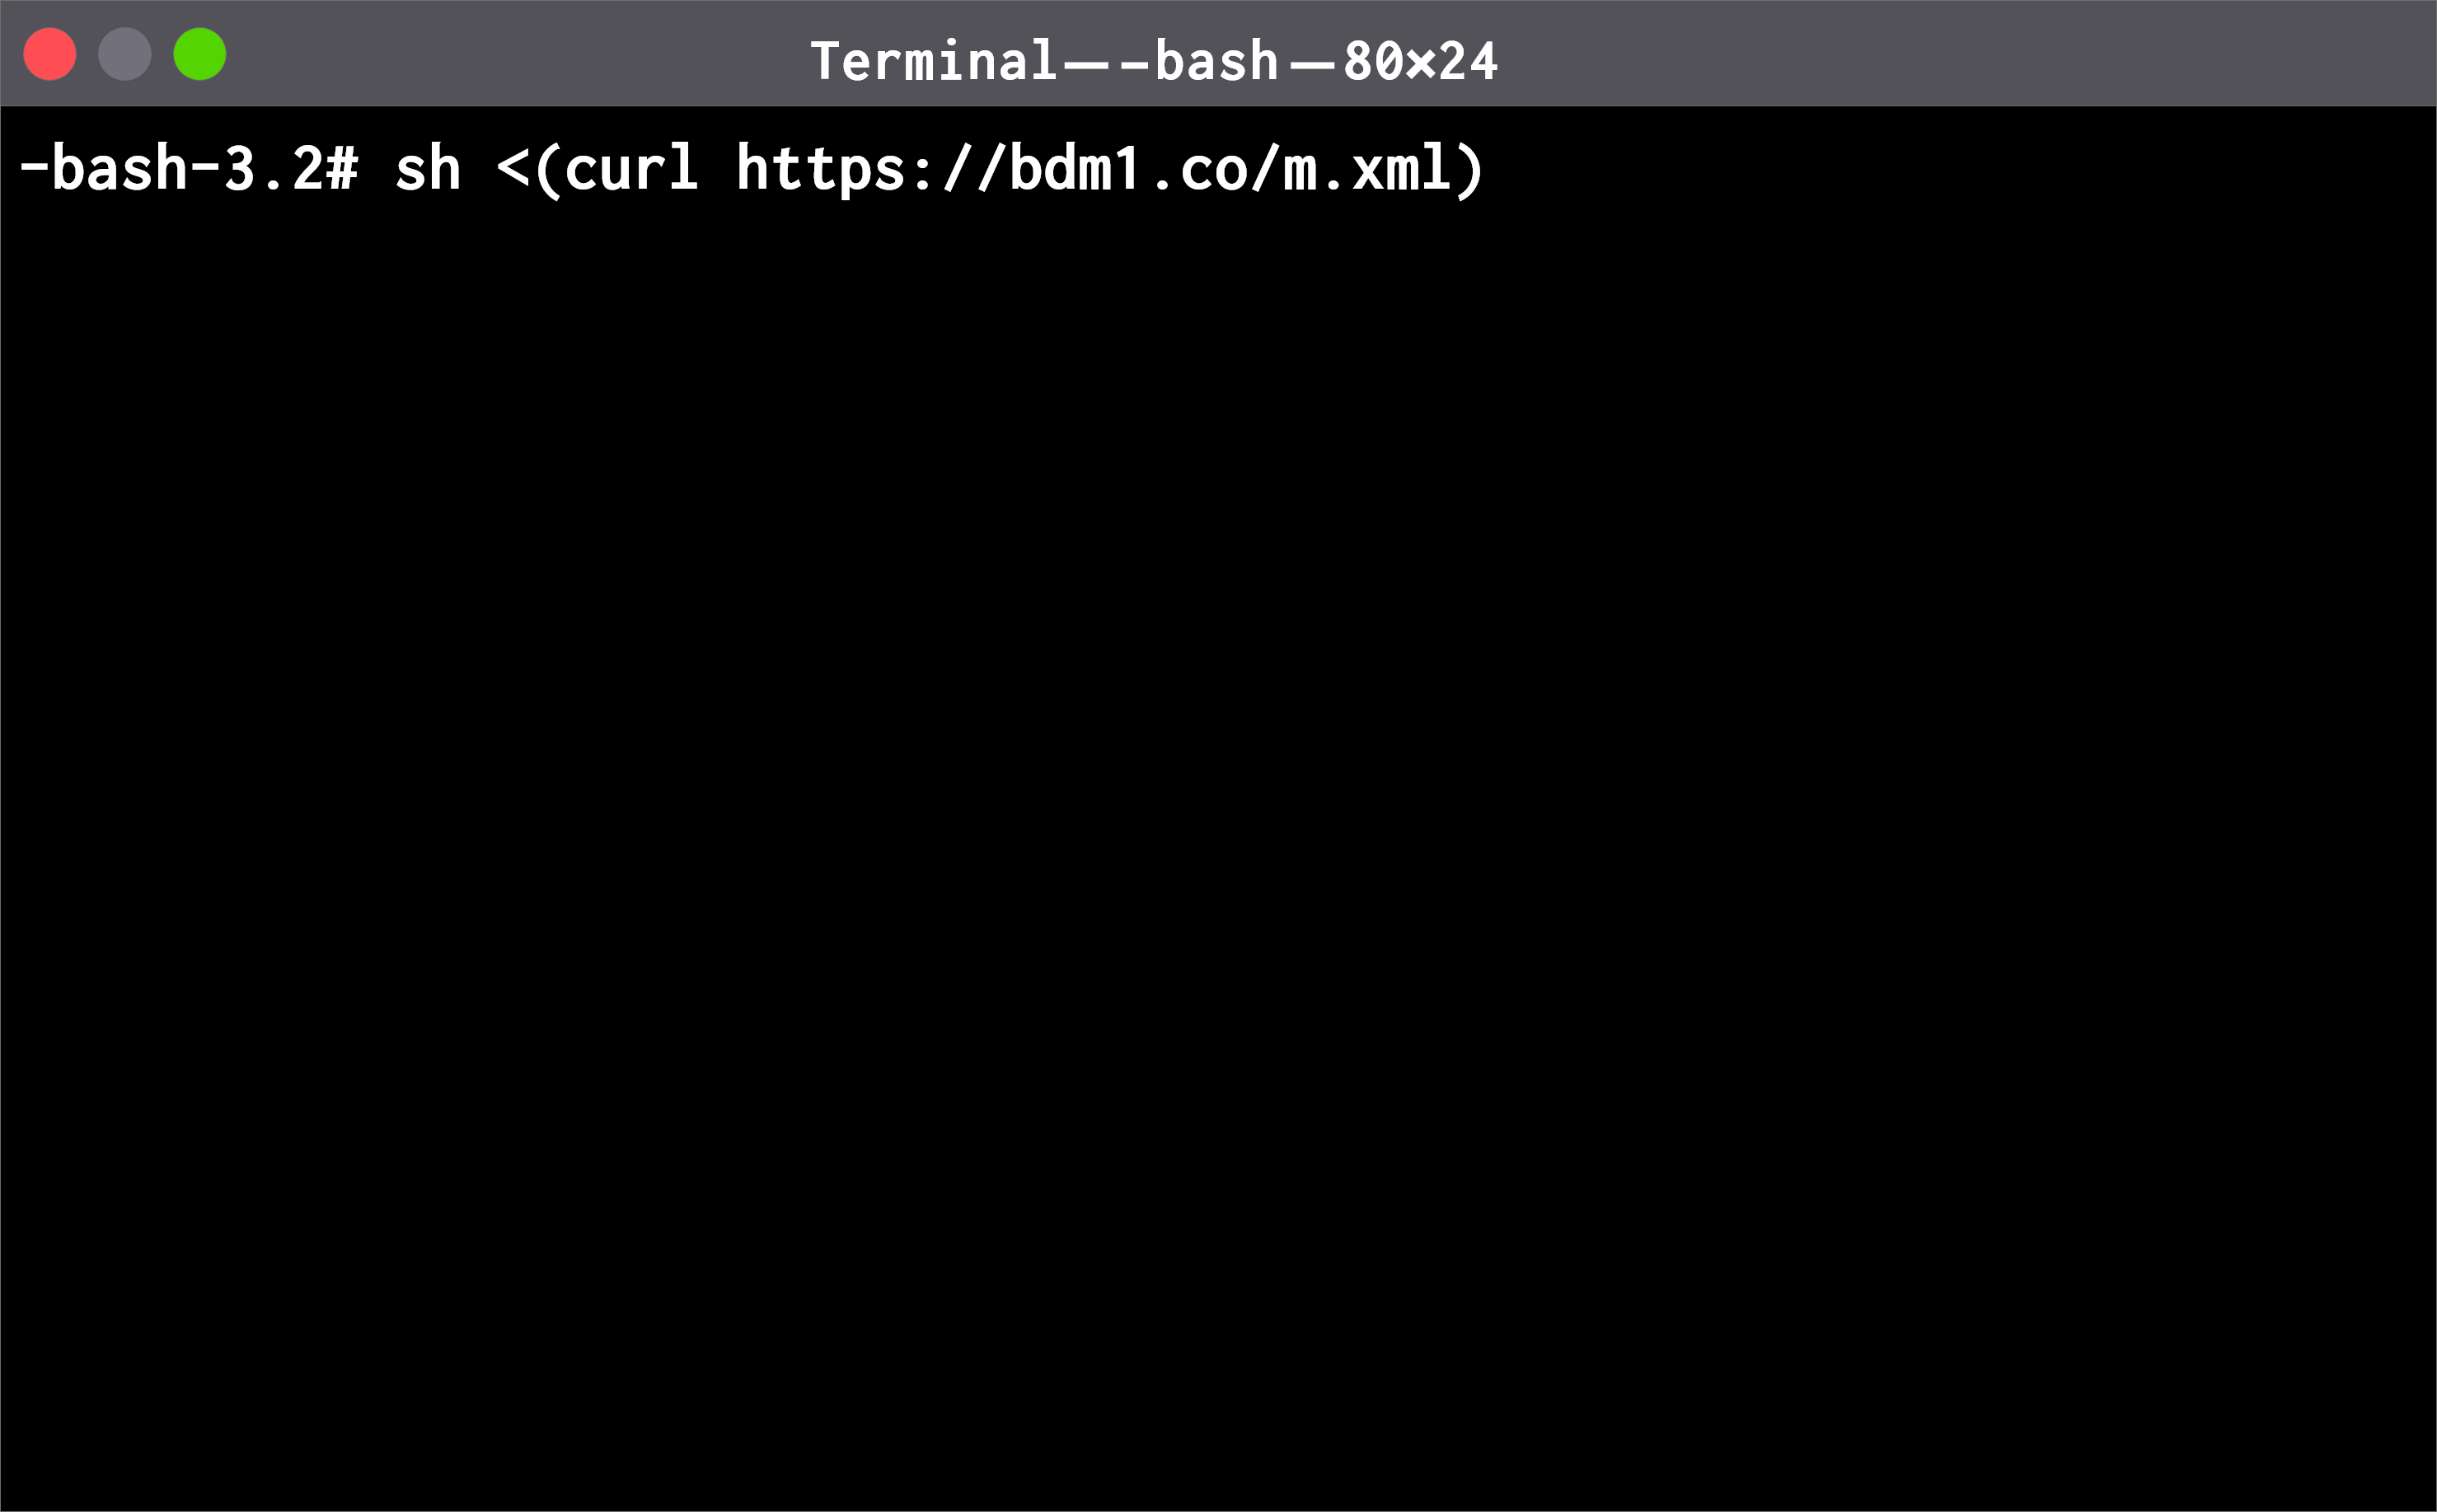
Image 3: Type Command in Terminal Window
Step 4: You will see BitRaser Drive Eraser for Mac main screen listing your internal drive. (Refer to Image 4)
Connect the application to the BitRaser Cloud server for fetching erasure licenses by clicking on the cloud icon on the right side and entering your login credentials. (Refer to Image 5)
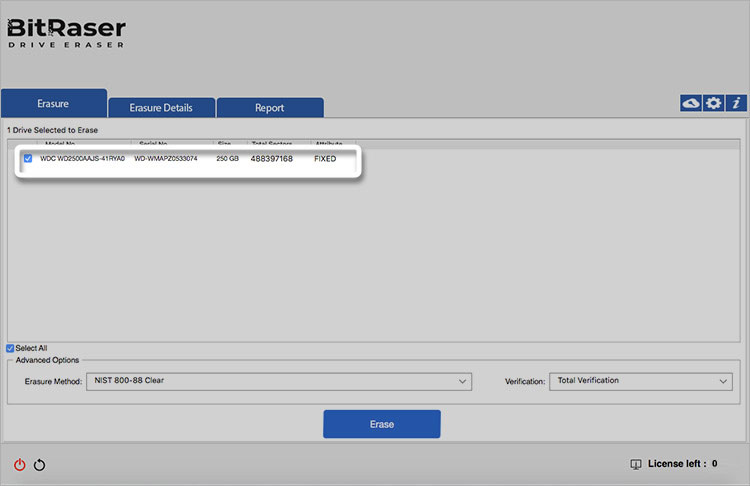
Image 4: BitRaser Drive Eraser Mac Main Interface
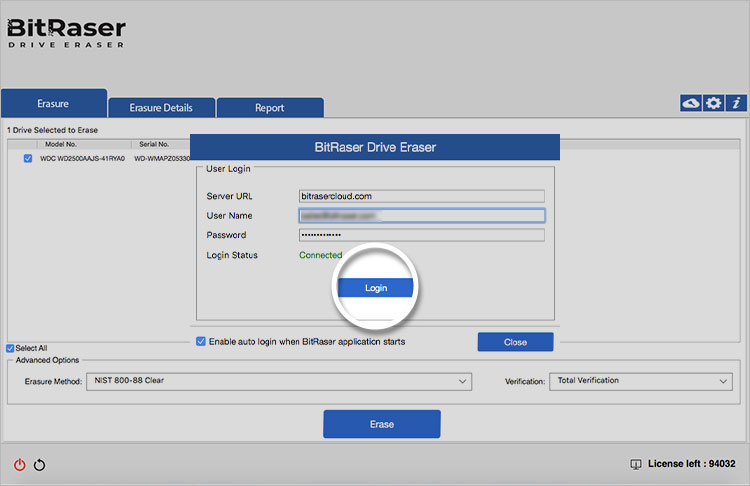
Image 5: Enter BitRaser Cloud Credentials
Step 5: Now click on 'Erase' to begin the Mac erasure process. An alert window will pop up informing you that all data will be erased beyond recovery; click 'Yes'. (Refer to Image 6)
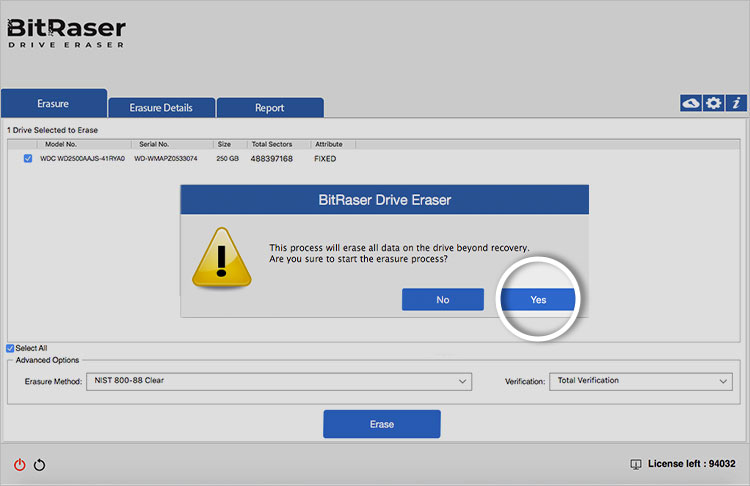
Image 6: Click Yes in the Alert Window
Your Mac Erasure process has begun; you can see the erasure status on your screen. It can take a few minutes to complete. (Refer to Image 7)
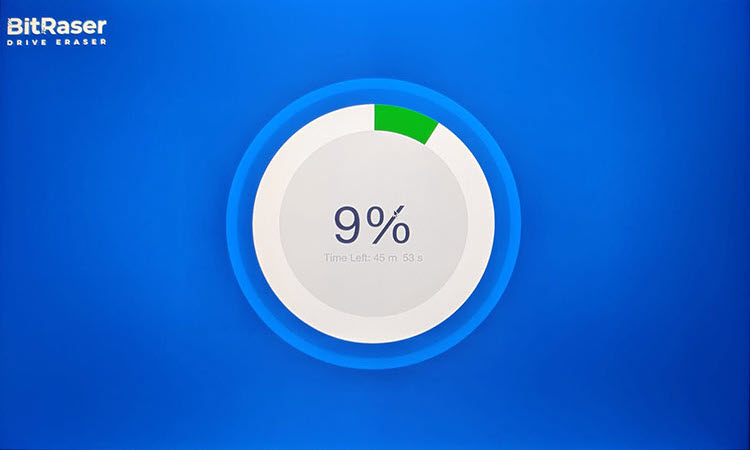
Image 7: BitRaser Drive Eraser Screensaver
When the Erasure process is completed, you will see a ‘Green Tick’ on your screen. (Refer to Image 8)
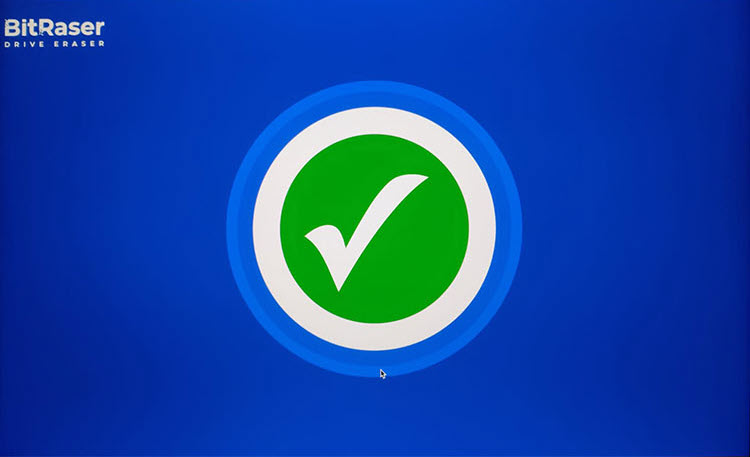
Image 8: BitRaser Screensaver Erasure Completed Screen
Your data on your Mac device has been permanently erased. You can view and download detailed Erasure Reports and Certificates for compliance purposes (Certificate of Data Destruction) from the secure BitRaser Cloud Console.
If you're looking to diagnose Mac devices to assess their functionality and the health of their hardware components, read our article: How to Perform Mac Diagnostics.


