This KB provides an overview of BitRaser Cloud console functionality and usage, covering user management, license distribution, erasure report management, and customizing ISO for automated data erasure.
BitRaser Cloud console helps automate the data erasure process, boosts efficiency, and lets organizations maintain a centralized repository of audit trail records to meet compliance. The secure cloud console helps businesses standardize the erasure process across locations with minimal effort. Moreover, admins can create and edit users, assign roles, and manage them to perform data erasure or diagnostics tasks. It also allows round-the-clock access to a centralized repository of erasure reports and certificates for audit purposes.
How to Access BitRaser Cloud Console?
Upon purchase of the BitRaser software, you will receive login credentials for BitRaser Cloud Console on your registered email ID.
Follow the link to change your password, and you are ready to start using the BitRaser Cloud Console.
How to Use BitRaser Cloud Console?
There are various tabs on the left menu of the BitRaser Cloud Console, namely, My Dashboard, New Dashboard, Users & Licenses, Reports, and Support; let us discuss the functionality of each one.
- My Dashboard: This is the default option of your BitRaser Cloud Console home screen. ‘My Dashboard’ contains information about your last recharge of licenses for various BitRaser products and shows available and consumed licenses.
There is an option to edit the dashboard and to add or remove widgets. By default, the cloud console shows a ‘Graph’ view. However, you can change it to a ‘List’ view per your requirement. In the List view, consumed and available licenses are shown product-wise, and recharge history is shown date-wise. You need these licenses to erase data from a device or run mobile diagnostics. These licenses are consumed when the user performs an erasure or diagnostic task; 1 license per device is deducted for every task. (Refer to Image 1 a, b)
- New Dashboard: You can create your dashboard and show only the details you want on every login. (Refer to Image 2)
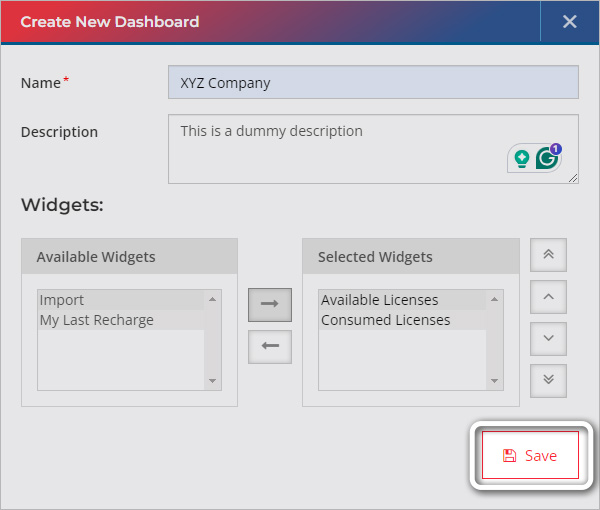
Image 2: Create a New Dashboard BitRaser Cloud
- Users & Licenses:
Under this category, there are four sub-headings – Licenses, Groups & Users, Roles, and Users Monitoring.
- Licenses: It contains the license details for all your purchased products. It provides details like total available licenses & consumed licenses. Recharge history is available user & date-wise. Each user's license activity report is available according to the product type. (Refer to Images 3, 4 & 5)
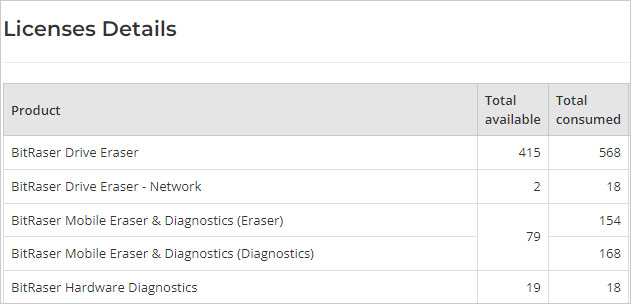
Image 3: Product License Tab BitRaser Cloud Console
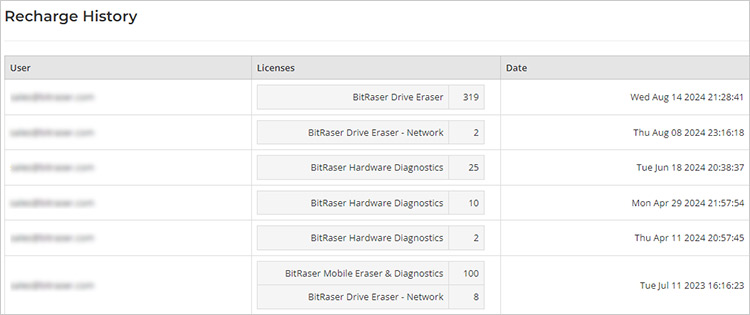
Image 4: Recharge History License Tab BitRaser Cloud Console
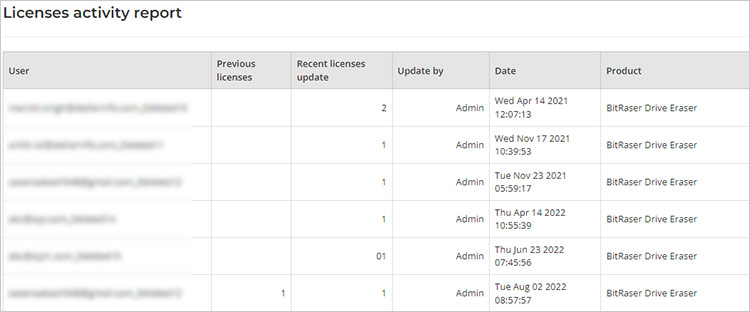
Image 5: Licenses Activity Report License Tab BitRaser Cloud Console
- Groups & Users: In this tab, you can view, manage, edit, and delete the ‘Groups’ & ‘Users’ created by you. (This feature is only available with the Admin)
Users and groups are created for assigning licenses to perform data erasure & diagnostics.
BitRaser Cloud Console allows assigning licenses to users in the following ways:
-
- Pool Licenses: The licenses are assigned to the users in a Pool Group. Only the Admin or Manager has the right to create and distribute the licenses in a Pool Group. This functionality's main advantage is making licenses available to a pool of users rather than one user to perform uninterrupted data erasure.
- Individual Licenses: The licenses are assigned to a specific user not part of the Pool Group. Individual users can be found under the default group tab.
The admin can assign licenses, view users, and change their roles. (Refer to Image 6)
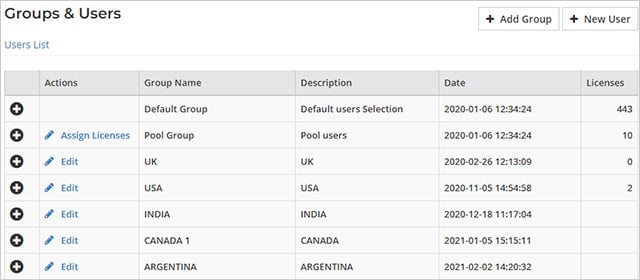
Image 6: Group and Users License Tab BitRaser Cloud Console
Roles: This tab only provides information about the various user and their rights - Admin, Manager, Standard User, Pool User, and Auditor. (Refer to Image 7)
The roles can be assigned when creating a user under the Groups & Users tab.

Image 7: Roles License Tab BitRaser Cloud Console
- Users Monitoring: This functionality helps the Admin view each user's activity, including their ‘Login’ and ‘Logout’ time. (Refer to Image 8)
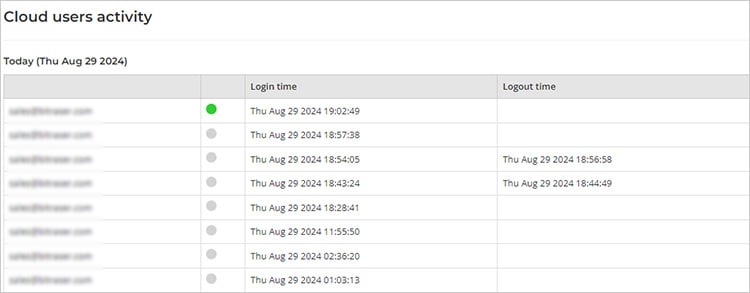
Image 8: Users Monitoring License Tab BitRaser Cloud Console
Centralized Repository of Data Erasure Reports & Certificates:
BitRaser Cloud Console allows easy access to reports & certificates of erasure. These can be accessed via the reports tab and are bifurcated according to BitRaser product type. (Refer to Image 9)
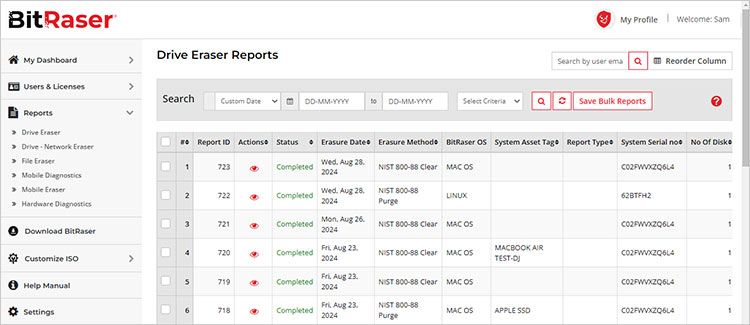
Image 9: Reports Tab BitRaser Cloud Console
The report can be searched according to multiple criteria, making finding an old report or certificate easy. For Example, for an audit inquiry, a particular disk serial number’s report is required to be fetched; you can simply search by the ‘Disk Serial Number’. (Refer to Image 10)
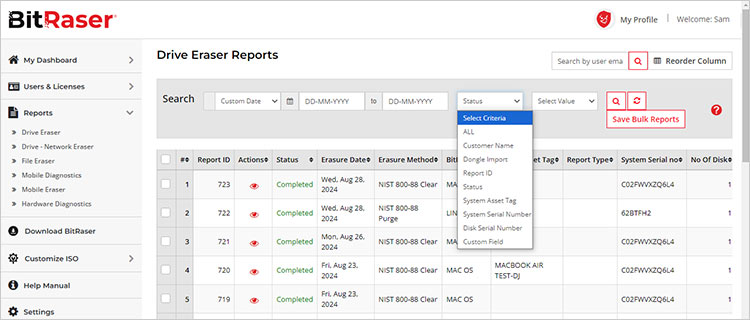
Image 10: Report Search Criteria BitRaser Cloud Console
Furthermore, you can access the certificates from the save certificate tab.
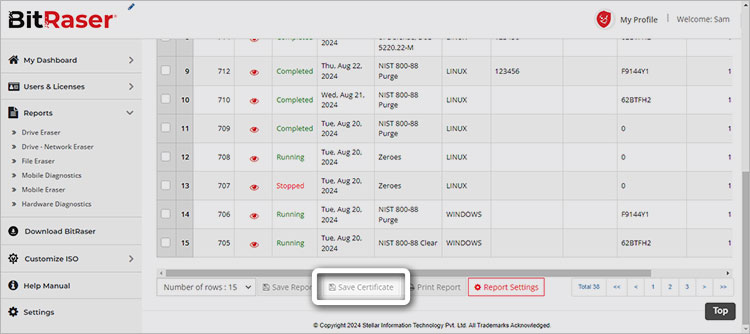
Image 11: Save Certificate of Erasure BitRaser Cloud Console
Automating Erasure Process with ISO Customization:
Users can leverage the customize ISO feature to standardize and automate data erasure processes across locations as per organizational requirements. Standardization helps eliminate human errors and negligence. Automating erasure tasks helps save time and ensure consistency in the data erasure process. (Refer to Image 12)
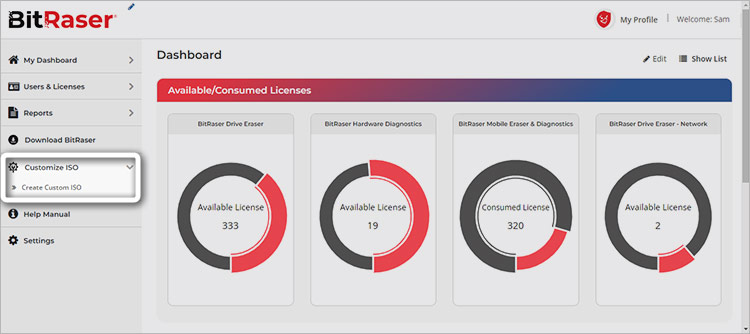
Image 12: Customize BitRaser Drive Eraser ISO


