The Apple M2 chip is the second generation of Apple Silicon, announced at WWDC on June 6th, 2022. It succeeds the M1 chip and powers devices such as:
- MacBook Air (M2)
- MacBook Pro (M2)
- iPad Pro
- Mac Mini
- M2 Pro and M2 Ultra models
BitRaser Drive Eraser & Diagnostics for Mac is a unified tool that enables secure erasure and comprehensive diagnostics of Mac devices with both Apple Silicon and Intel processors.
Follow these steps to erase a MacBook with an M2 chip:
Step 1: Long-press the ‘Power Button’ until the time you see the startup options. Select 'Options' and click on 'Continue' (Refer to Image 1).
Ensure that you have an internet connection.
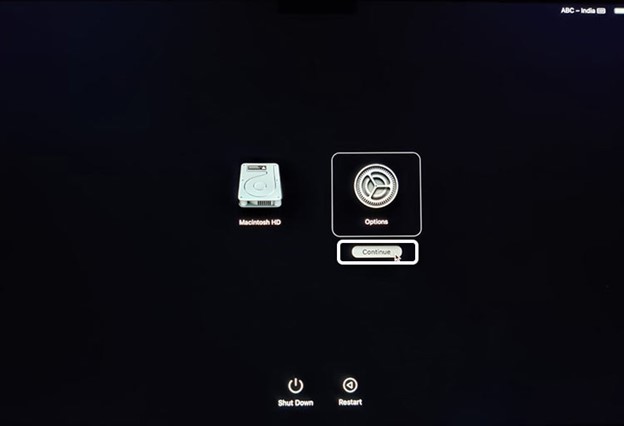
Image 1: Long-press the Power Button to access Startup options on Mac M2
Step 2: You will be taken to the macOS Recovery screen. Click on Utilities, then select ‘Terminal’.
Step 3: Type the following command in the terminal window:
sh <(curl https://bdm1.co/m.xml)
BitRaser Drive Eraser for Mac gets initiated, and the main UI appears (Refer to Image 2).
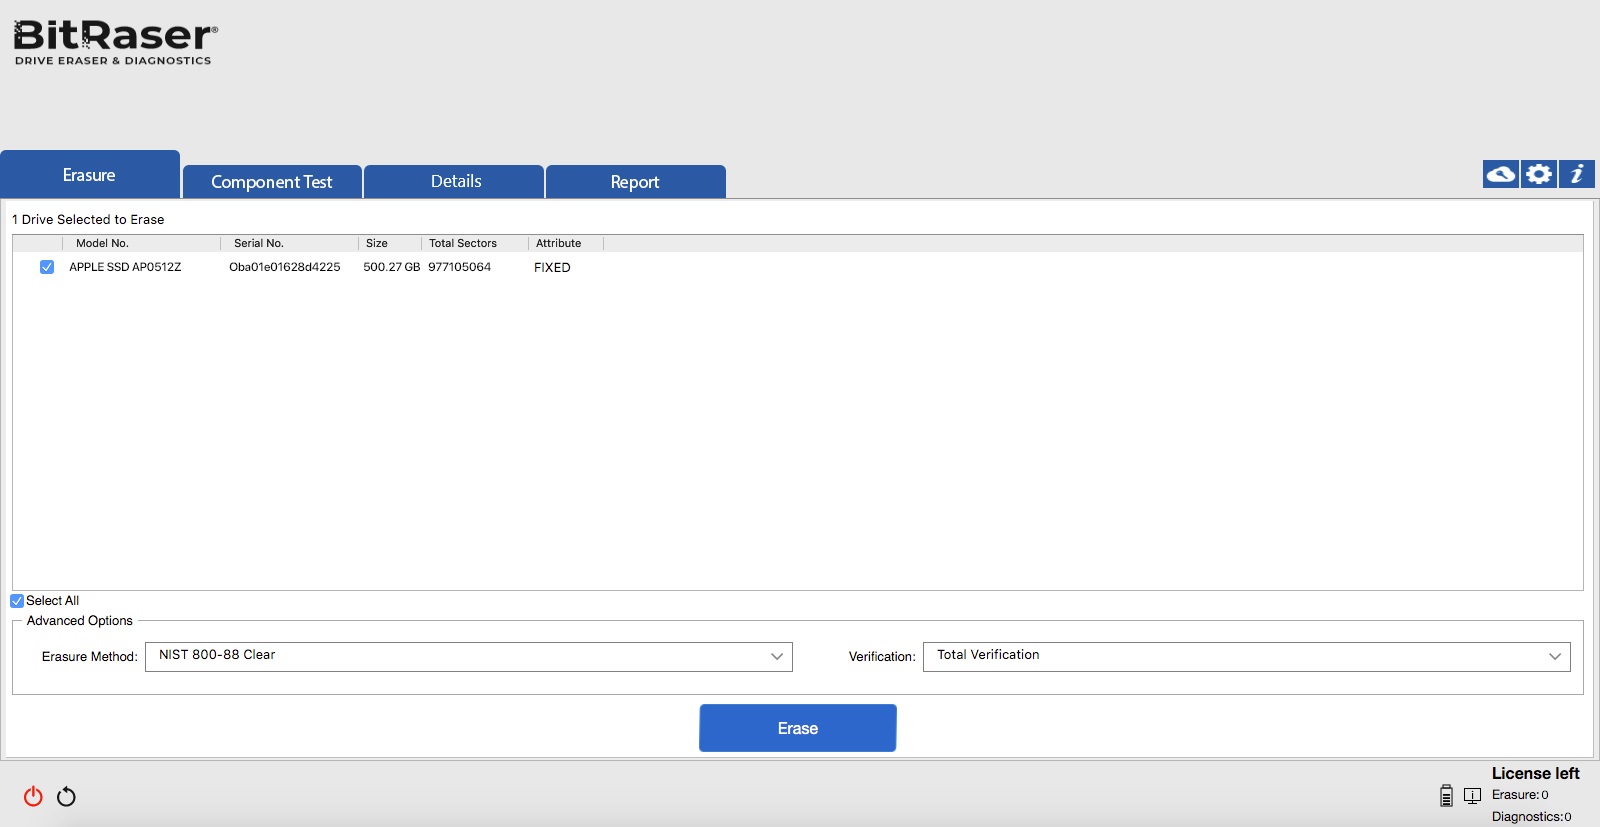
Image 2: BitRaser Drive Eraser & Diagnostics Mac UI
The main UI has four tabs:
- Erasure
- Component Test
- Details
- Report
The Erasure tab opens by default, letting you choose the erasure standard to wipe the internal Apple drive.
Step 4: Click the cloud icon at the top-right corner and sign in using your BitRaser Cloud credentials to fetch Mac erasure licenses. Once connected, your available erasure and diagnostics licenses will appear in the bottom-right corner. Click ‘Erase’ to begin the erasure process.
Once the process is completed, a digitally signed erasure report is generated and saved to the BitRaser Cloud Console (Refer to Report).
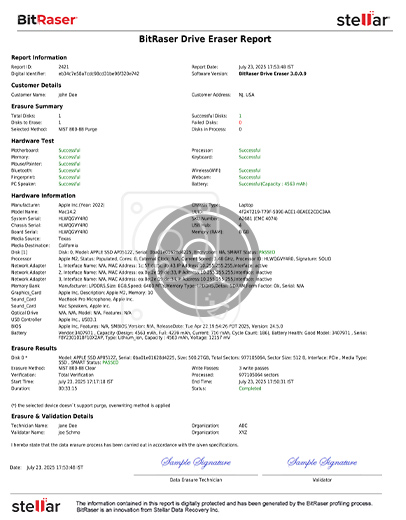
BitRaser Drive Eraser & Diagnostics Report
Need More Help?
These were the brief steps to initiate data wiping on Mac M2. For complete deployment and diagnostic instructions, refer to our detailed guides:


