Data erasure is a critical part of data lifecycle management, especially when handling sensitive personal or corporate data. One of the most trusted methods for secure data destruction is the DoD 5220.22-M standard, a data wiping algorithm developed by the U.S. Department of Defense. It ensures permanent erasure by overwriting storage media with predefined binary patterns across multiple passes, making data recovery impossible, even with advanced forensic tools.
In this Knowledge Base article, you’ll learn how to use the Cloud Variant of BitRaser Drive Eraser, a certified DoD wipe software, to securely erase data from PCs, laptops, MacBooks, and servers using the DoD 5220.22-M standard.
Prerequisites Before You Begin
Before starting the erasure process, ensure the following:
- You have an active internet connection.
- You’ve downloaded the BitRaser Drive Eraser ISO on your system from BitRaser Cloud Console.
- You’ve created a bootable USB drive using Rufus. For a step-by-step guide on creating a bootable USB with Rufus, you may refer to our KB article. (See Image 1)
- You’re ready to boot the target system from the USB.

Image 1: BitRaser Drive Eraser Bootable USB created with Rufus
Let’s dive into the steps to Wipe Drives Using BitRaser DoD Wipe Software.
Step 1: Boot the System Using BitRaser USB
- Insert the bootable USB into the target device.
- Restart and boot from USB via BIOS/UEFI.
- You will see the BitRaser boot screen. (See Image 2)
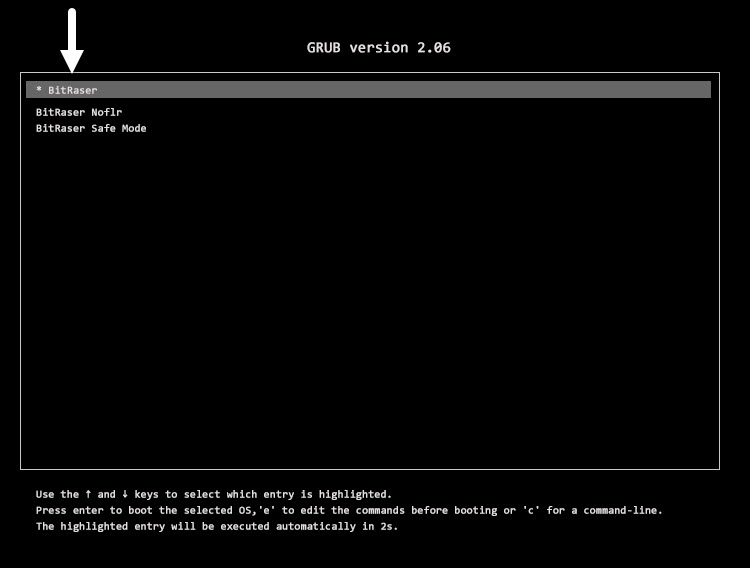
Image 2: BitRaser Boot Screen
Step 2: Select the Drive(s) You Want to Wipe
- From the BitRaser dashboard, choose the drive(s) you wish to erase.
- You can select internal or external drives connected to the system. (See Image 3)
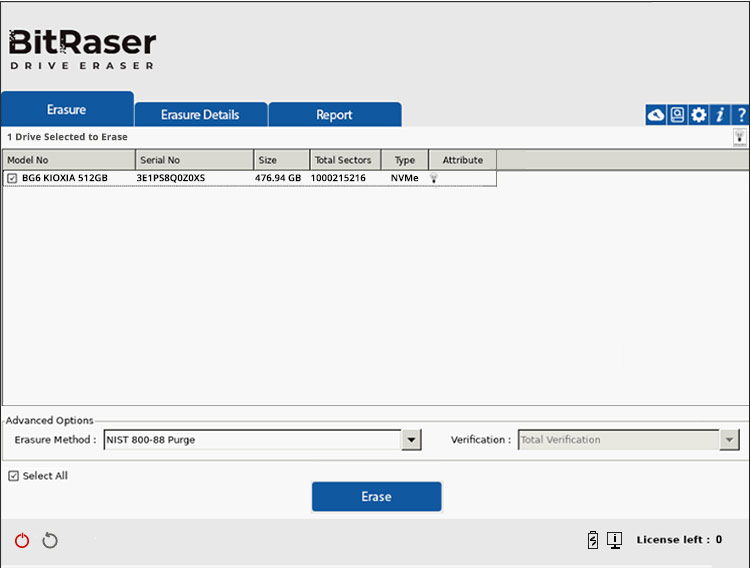
Image 3: BitRaser UI; Drive Selected for Erasure
Step 3: Connect Application to BitRaser Cloud Console
- Open Settings and go to the ‘Network’ tab. Enter your Wi-Fi or Ethernet credentials and click ‘Connect.’ (See Image 4a)
- Next, go to the ‘BitRaser Server’ tab. Enter your BitRaser Cloud credentials, click ‘Connect,’ then click ‘OK.’ (See Image 4b)
- Once connected, your erasure licenses will appear in the bottom-right corner.
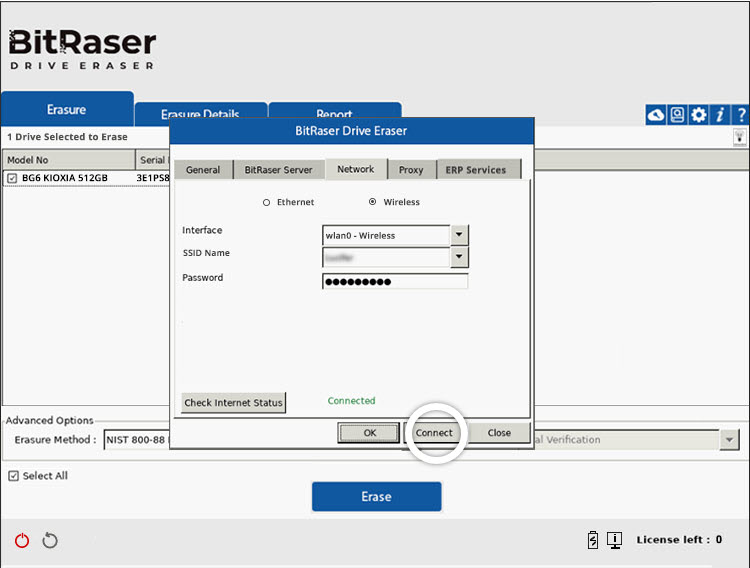
Image 4a: BitRaser Drive Eraser Network Tab

Image 4b: BitRaser Drive Eraser BitRaser Server Tab
Step 4: Choose DoD 5220.22-M as the Erasure Standard
- Click on the ‘Erasure Method’ dropdown.
- Select the ‘US Department of Defense, DoD 5220.22-M (3-passes)’ method. (See Image 5)
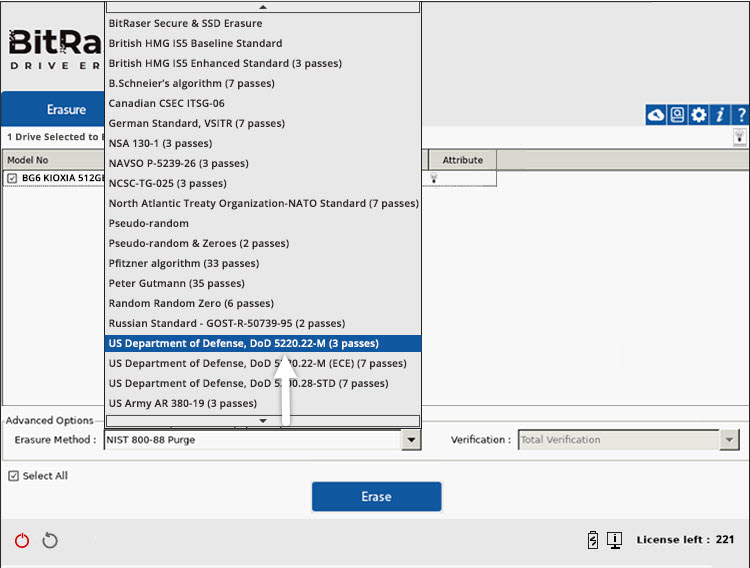
Image 5: US DoD 5220.22 – M Erasure Method Selected
Step 5: Start the Erasure Process
- Click on ‘Erase’ to begin the DoD wipe process. (See Image 6a)
- Click on ‘Yes’ on the erasure confirmation screen. (See Image 6b)
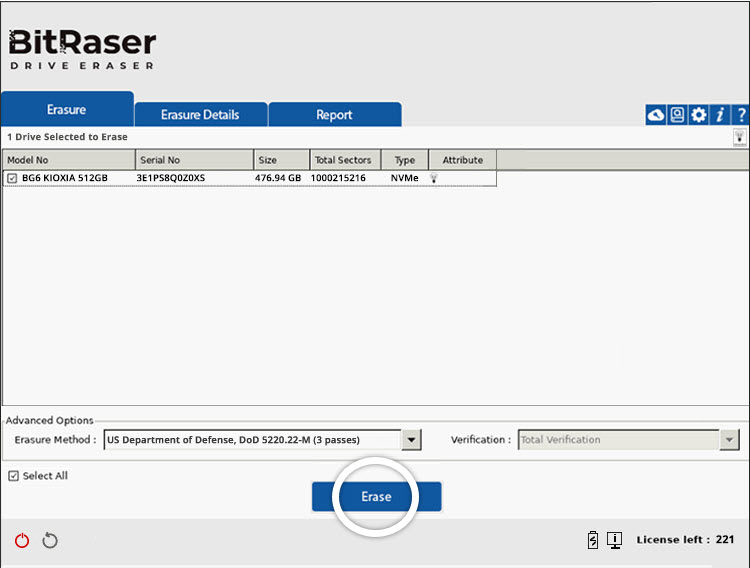
Image 6a: Click Erase to Begin DoD Wipe Process
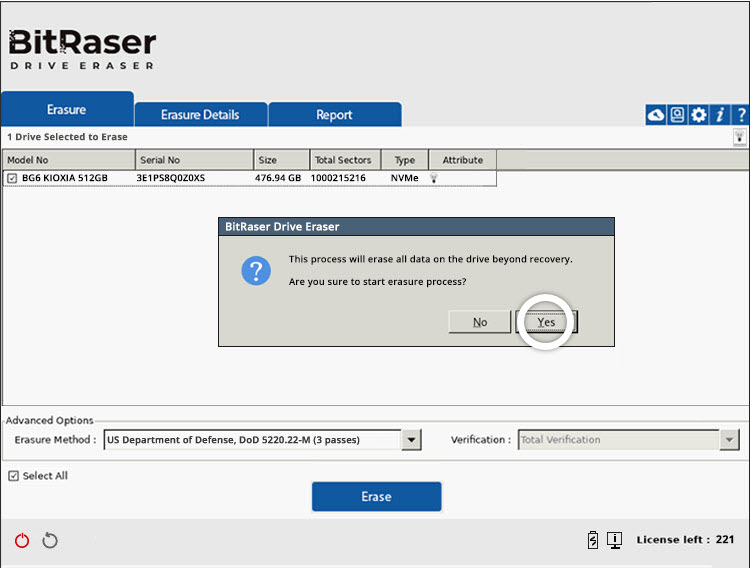
Image 6b: Click Yes on Erasure Confirmation Screen
You will be able to see the erasure progress on your screen and screensaver. (See Image 7a & 7b)
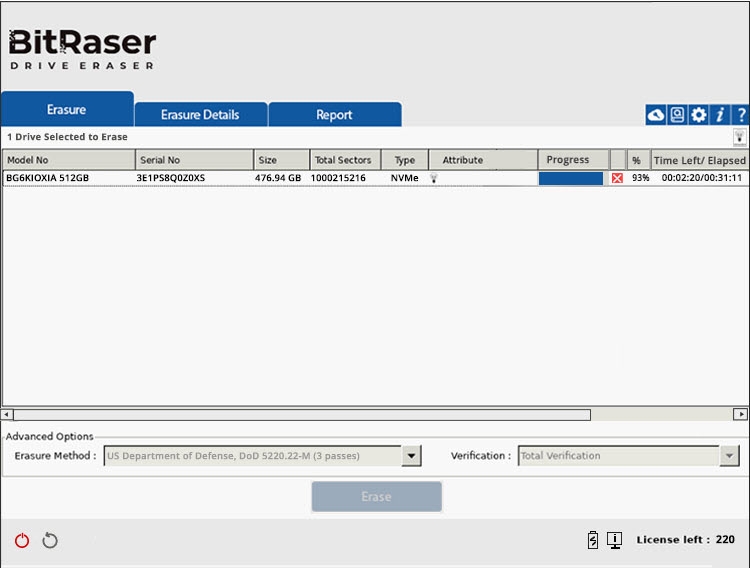
Image 7a: Erasure Progress of BitRaser DoD Wipe Software

Image 7b: DoD Wipe Process Completed Screensaver
Once the DoD wipe is complete, BitRaser generates a tamper-proof Certificate of Erasure and a detailed erasure report. These act as audit trails and help you stay compliant with data protection regulations. (See Certificate)

Image 8: DoD Wipe Sample Certificate of Erasure
Important: If you manage large IT assets, you can customize the BitRaser ISO to pre-select DoD 5220.22-M as the default wipe standard. This ensures consistent, automated DoD-compliant erasure across devices. Read this KB to learn how to
customize the BitRaser Drive Eraser ISO file.
Conclusion
Whether you're an ITAD, enterprise, or government organization, BitRaser offers a robust solution as a DoD erase software. With this guide, you can confidently perform secure, DoD-compliant erasure and generate audit-ready certificates.


