Through our series of articles on NIST SP 800-88 Clear and NIST SP 800-88 Purge, we have already given details on how data is wiped from hard disk drives and other storage media to attain complete sanitization. For a recap, we would like to give a brief here before listing the steps to wipe a hard drive.
NIST SP 800-88 Clear uses techniques to erase data from locations that are user-addressable. These are applied via Read and Write commands used by a data-wiping software. Once device is erased using NIST Clear, non-invasive data recovery tools are incapable of retrieving data from the wiped hard drive.
NIST SP 800-88 Purge uses either logical or physical data sanitization techniques which ensure data recovery is not feasible even with the most advanced tools. For ATA hard drives, it offers three logical sanitization options, which are automatically selected based on the drive’s capabilities:
- Overwrite EXT Command: One write pass of a fixed pattern is applied across the storage media.
- Cryptographic Erase (CE): Use CRYPTO SCRAMBLE EXT in case the device supports encryption and follow it by an overwrite command. If the overwrite command fails, either NIST 800 88 Secure Erase or NIST 800 88 Clear will be applied.
- NIST 800-88 Secure Erase: NIST SECURE ERASE UNIT command can be used if enhanced mode is supported.
Explore step-by-step instructions below in this knowledge base for understanding how to wipe hard drives using NIST SP 800-88 Clear and Purge data sanitization methods.
Stage 1: The first stage begins with downloading the BitRaser Drive Eraser ISO file. For stepwise instructions, read the ‘Downloading the BitRaser ISO File’ section of the knowledge base article.
You can customize the BitRaser ISO file to speed up the process and reduce human intervention at the time of data erasure. It includes selecting the erasure method, enabling auto-erase, and saving the network and BitRaser server account credentials in advance. We have customized BitRaser Drive Eraser Cloud Variant ISO and pre-selected the NIST 800-88 Purge standard. (Refer to Images 1, 2, 3, and 4)
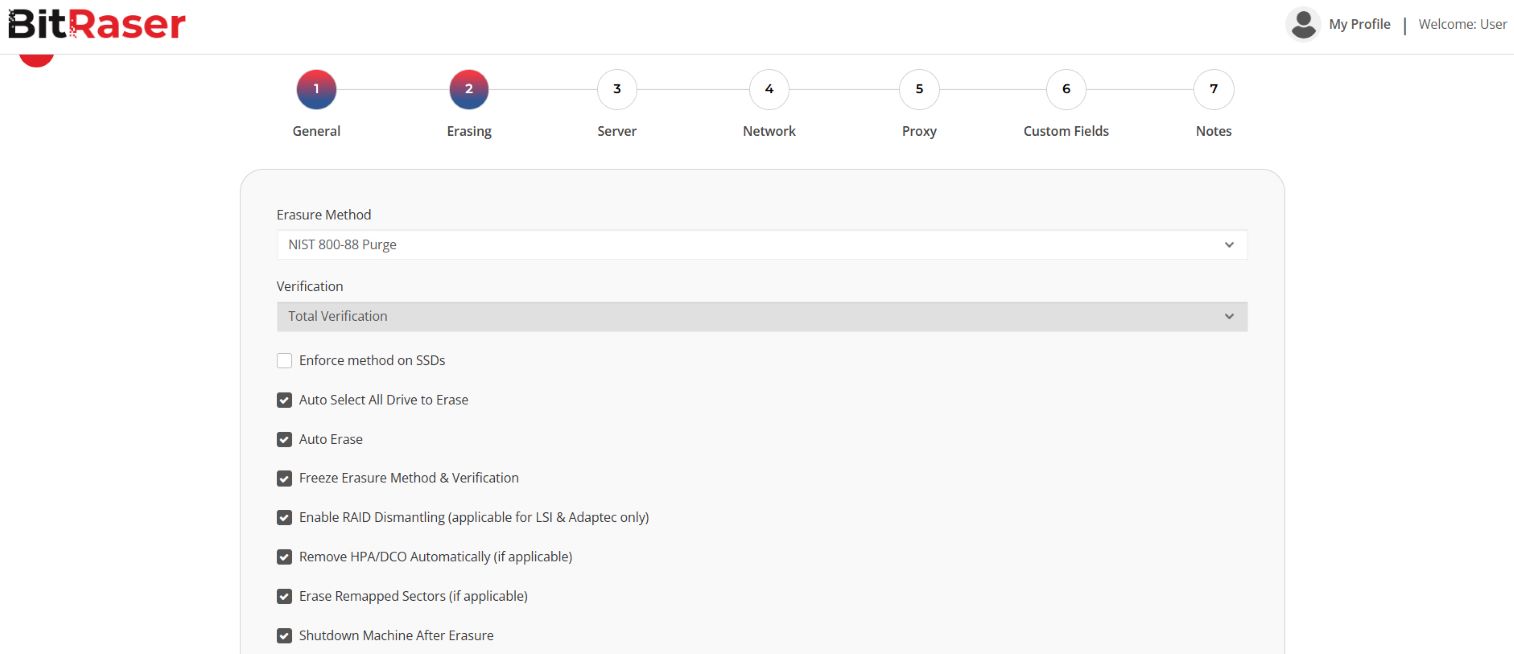
Image 1: BitRaser Drive Eraser ISO Customization

Image 2: Enter the Credentials to Connect to BitRaser Server
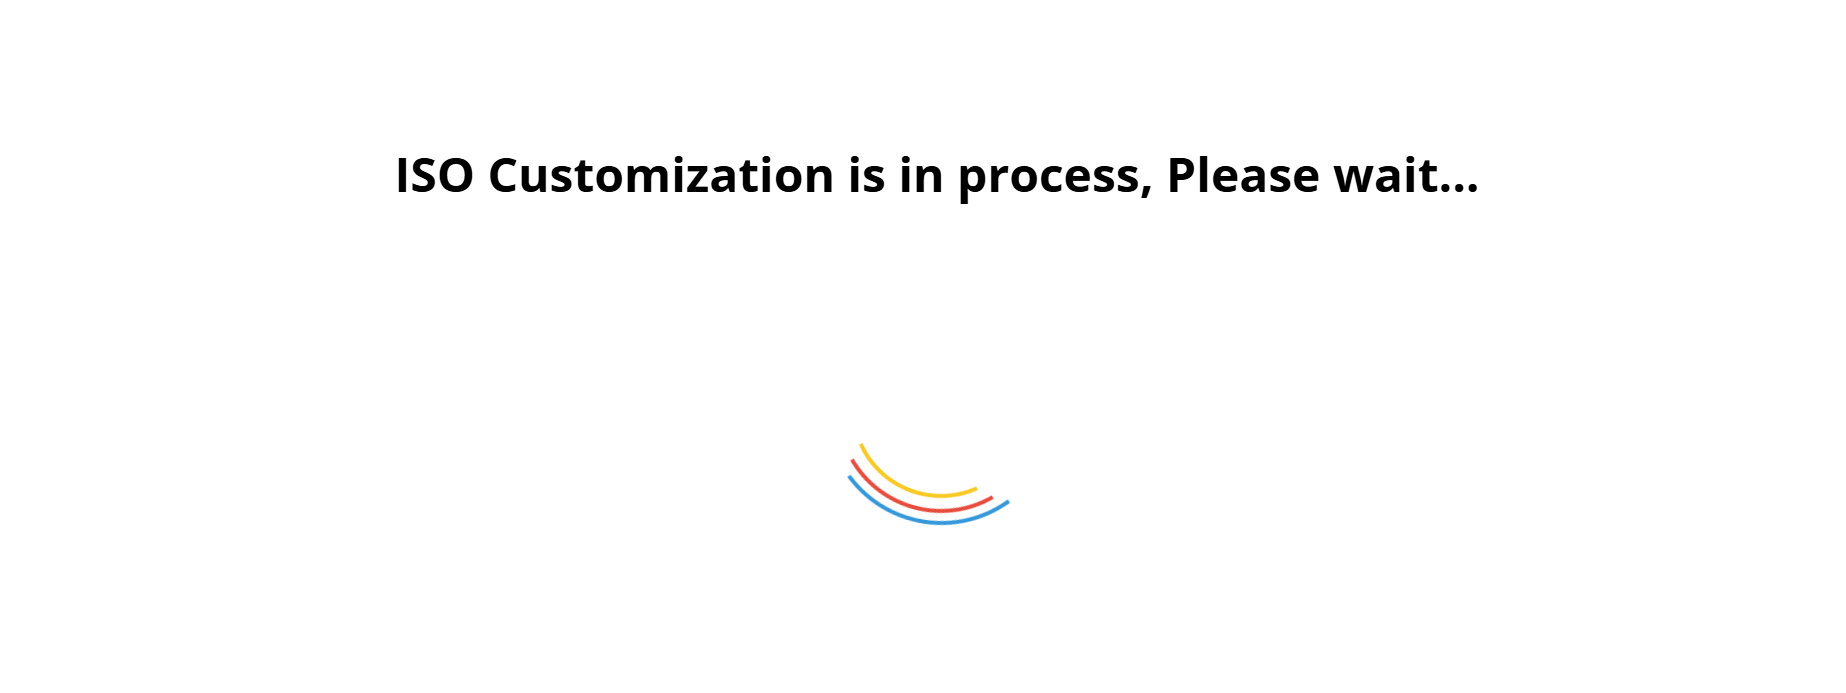
Image 3: BitRaser Drive Eraser ISO Customization in Process
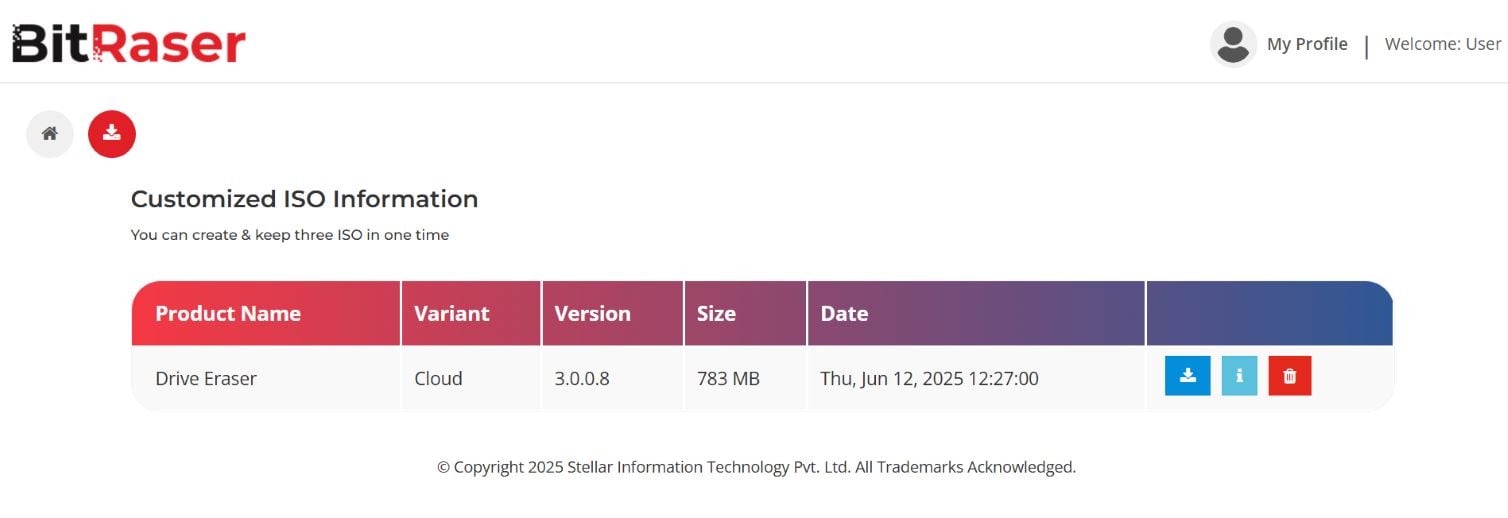
Image 4: Information for Customized BitRaser ISO
Stage 2: The customized ISO file needs to be written on a USB. Use Rufus, a free open-source software, to create a BitRaser bootable USB.
- Step 1: Next, connect your BitRaser Bootable USB to the device (PC or laptop) you need to erase.
- Step 2: Depending on your device, use the key (usually F1, F2, or F12) to enter the ‘Boot Selection Menu’ in the BIOS. Then, select the BitRaser Bootable USB.
It is important to note that since this ISO was customized, credentials for the network and BitRaser cloud console account were saved in advance, and auto-erase was enabled. Hence, there is no need for the user to enter internet details or even interact with the software. Once the machine boots through the USB, the software automatically runs and starts erasing the hard drives.
For those users who chose to skip the ISO customization step, they need to follow Stage 3.
Stage 3: This stage will help you connect to the internet to get your licenses from the BitRaser cloud and start erasing the hard drive using the NIST 800 88 standard.
- Step 1: To connect the application to the internet, click on the settings icon on the top right and then, select ‘Network’ tab on the pop-up window. BitRaser is compatible with Ethernet and wireless network connections; select one to connect to the internet.
Note: An internet connection is required to enable connection with the BitRaser server and then to fetch BitRaser licenses and sync reports and certificate of erasure. These complete detailed documents are available on your BitRaser cloud console once the process to erase a hard disk is completed.
- Step 2: Click on ‘BitRaser Server,’ which is on the left of the Network tab. Enter your credentials for the BitRaser cloud console account.
Upon successful connection to the server, ‘Connected’ will be displayed as the Login Status and Running as the BitRaser Cloud Status.
- Step 3: At the bottom, under ‘Advanced Options,’ there is a drop-down menu for erasure methods. Select NIST 800-88 Clear or NIST 800-88 Purge as your preferred data erasure method. Then, click on ‘Erase’ to proceed with the erasure process to wipe the selected hard disk drive. Click on ‘Yes’ on the pop-up window to confirm your choice to proceed. (Refer to Images 5,6, and 7)
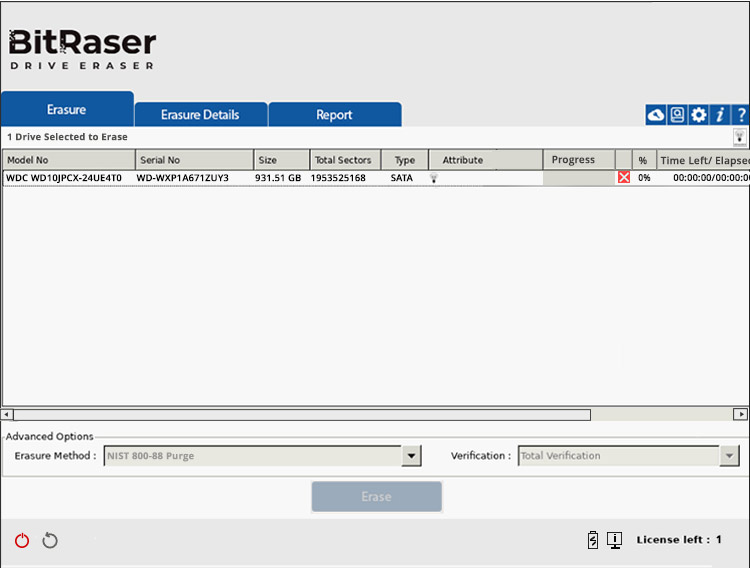
Image 5: HDD Erasure Process Using NIST 800 88 Begins
BitRaser will begin erasing the hard drive using NIST 800-88. The progress of erasure in the form of percentages will be displayed on the screen. After the process completes, the erasure report and certificate of destruction show the updated status, customized details, and NIST 800 88 Secure Erase as the method that erased the hard drive. You can access the erasure reports and certificate of destruction from your BitRaser cloud console account and download them in PDF, CSV, or XML formats for offline use.
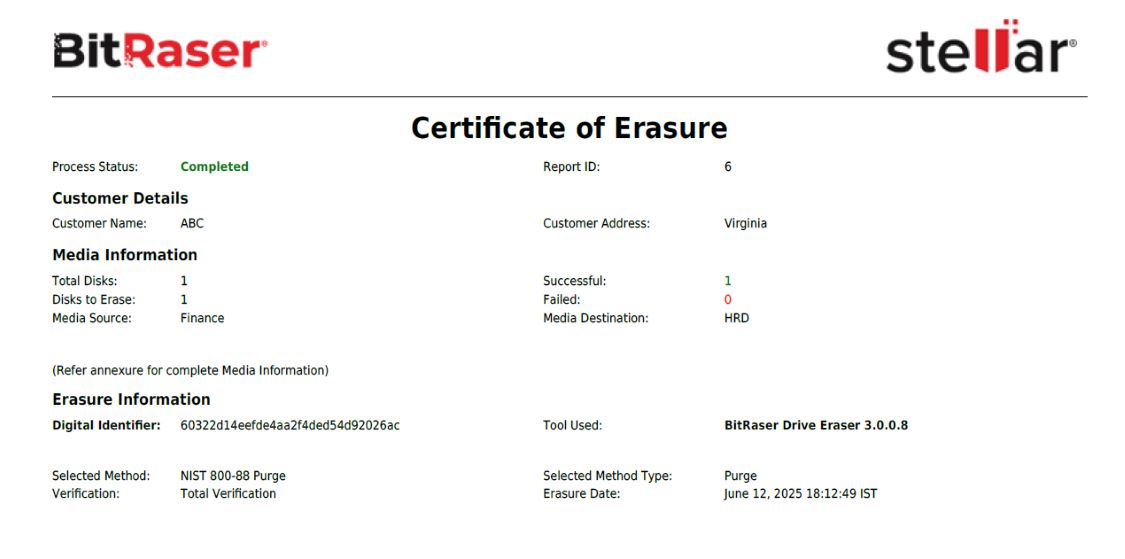
Image 6: A Snapshot of the Certificate of Erasure
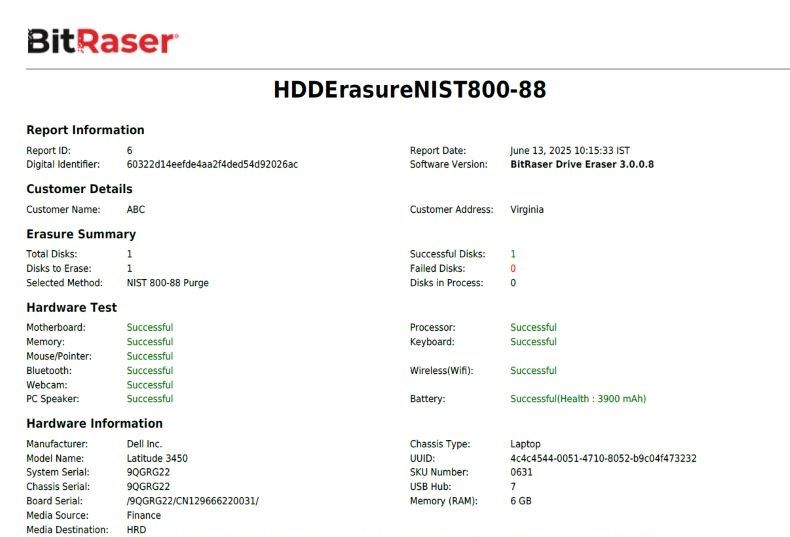
Image 7: A Snapshot of the Erasure Report
In this KB, we have only covered NIST 800 88 Secure Erase; however, depending upon the drive type, for example, SED, the CE method will be used for wiping the solid-state drive. For a clear understanding, reach out to our team at [email protected] or book a demo today!


