A hard drive is any type of drive that is used to store data in a laptop, desktop, Mac, server, etc. They are classified into different types depending on their interface, technology, and performance. Knowing how to wipe a hard drive is essential to ensure data confidentiality and safeguard data privacy in end-of-life assets. Let us explore the various types of hard drives you may need to wipe.
BitRaser Drive Eraser helps you wipe or erase the following types of hard drives:
- HDD: Hard Disk Drive
- SATA: Serial Advanced Technology Attachment
- PATA: Parallel Advanced Technology Attachment
- USB drives: Universal Serial Bus
- Hard drives using IDE, Fibre Channel, or FireWire interfaces and more.
BitRaser Drive Eraser is an easy-to-use tool that can be deployed with minimal effort, and you can begin erasing or wiping a hard drive within a couple of minutes.
Note: You can also wipe an SSD (Solid State Drive) with BitRaser Drive Eraser software. Refer to our KB article How to Wipe SSDs?
Requirements:
- Processor: x86 or x64 Processor
- RAM: 1 GB Minimum (4 GB Recommended)
- USB Drive: Minimum 2 GB to create a bootable USB (USB 3.0 recommended)
- USB Port: 2.0/3.0
We have divided the guide into 2 stages for your ease of understanding:
Stage 1: Download BitRaser ISO & Make a Bootable USB
- Step 1: Log in to your BitRaser Cloud Account using the credentials sent to you by email after purchasing the BitRaser Drive Eraser software.
- Step 2: Click on the 'Cloud Variant: BitRaser Drive Eraser' option in the 'Download BitRaser' section to download the BitRaser Drive Eraser software. (Refer to Image 1)
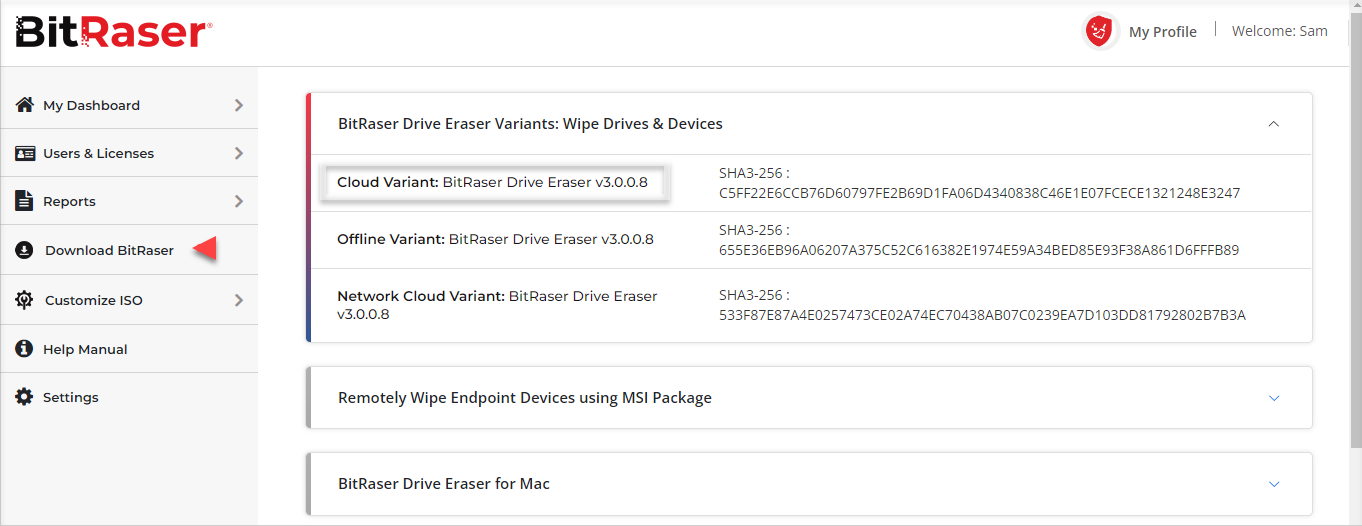
Image 1: Download BitRaser Drive Eraser ISO
Now, we will create a bootable USB by burning the BitRaser Drive Eraser ISO image on an empty USB flash drive. Using the bootable media, you will be able to wipe the hard drives, including the OS, without installing BitRaser. Please follow these steps to create the bootable media.
Note: If you are using a Mac (including a Mac with T1, T2, M1, and M2 Chip), you must use the 'BitRaser USB Creator' utility instead of Rufus. It is a proprietary utility developed for Mac devices to initiate the BitRaser Mac application for erasing Mac devices.
To learn how to use the BitRaser USB Creator tool, you can refer to our deployment guide for Mac devices: How to Wipe Mac Devices
Stage 2: Start Wiping the Hard Drive with BitRaser Drive Eraser
Using BitRaser Drive Eraser, you can wipe both internally and externally connected hard drives.
- Step 1: Plug the bootable media into the machine (laptop, desktop, PC).
- Step 2: Power ON the system and press the F12 key (For Dell machines) to enter the Boot Menu. (The button can vary according to your device manufacturer)
- Step 3: Select your bootable flash drive from the Boot Menu and press ‘enter'. Now, you will see the BitRaser Boot Menu; here, the first option, ‘BitRaser’, is selected by default. Press ‘enter’ to proceed. (Refer to Images 2 & 3)
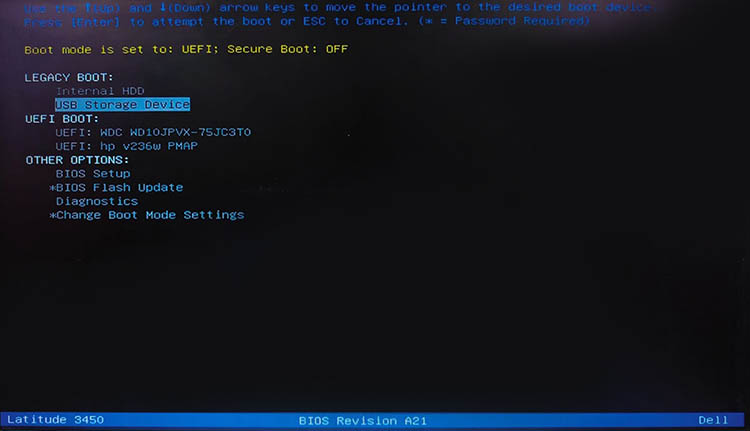
Image 2: Select Bootable USB and Press Enter
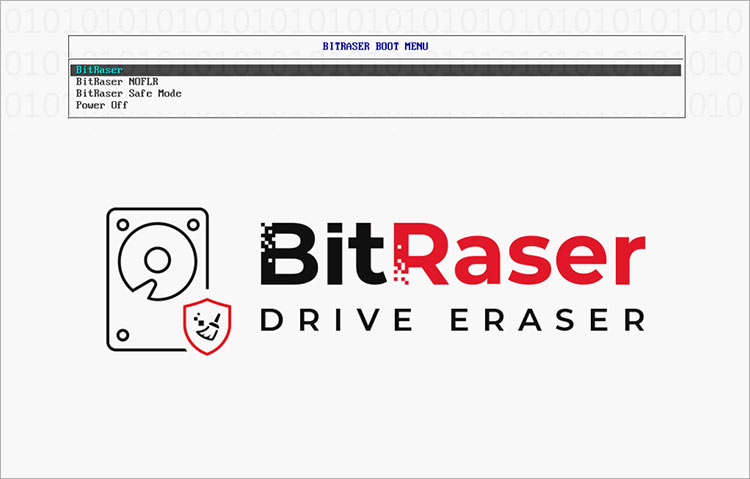
Image 3: BitRaser Boot Menu
- Step 4: Now, you can see all your connected drives listed on the BitRaser main interface. (Refer to Image 4)

Image 4: BitRaser Main Interface with Connected Drives
After wiping the hard drive, BitRaser Drive Eraser software will generate digitally signed tamper-proof erasure reports & certificates that are uploaded automatically to your BitRaser Cloud account.


