Serial Advanced Technology Attachment (SATA) is an interface that controls the read and write protocols between the motherboard and storage drives like HDD and SSD. Today, it is the default interface of most hard drives and some SSDs on desktops, laptops, and servers. SATA drives are renowned for their excellent storage capacities and faster data transfer rates than PATA (Parallel Advanced Technology Attachment). They are less expensive, & offer flawless compatibility with all operating systems and motherboards. SATA 3.5, the most recent version of SATA, was released in July 2020 and is found on modern motherboards, offering better performance and greater integration with other industry standards than traditional SATA hard drives. Modern SATA drives range from 500GB to 16TB and are suitable for bulk storage. (Refer to Image 1)
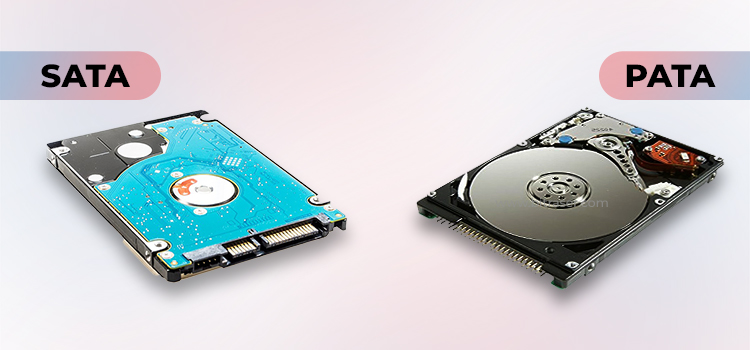
Image 1: SATA & PATA Drives
Once these drives reach their end-of-life or the device they come with is to be repurposed or resold, it becomes crucial to permanently remove data from them to safeguard privacy and maintain compliance with regulations. BitRaser Drive Eraser software helps you securely sanitize these SATA drives, leaving no scope for recovery, even in a forensic lab. Let’s see how you can use BitRaser Drive Eraser to wipe all SATA drive models.
For ease of understanding, we have divided this KB into 2 sections:
Download and Create a BitRaser Bootable USB
Wipe SATA Drives with BitRaser Drive Eraser
Ensure the following key requirements are fulfilled before beginning the data wiping process on SATA drives.
Key Requirements:
- SATA Drive to Wipe
- Laptop/Desktop to perform wiping
- USB Drive with 2GB or more space to create a bootable USB
- Wi-Fi or Ethernet for Internet (Offline Variant also Available)
Download and Create a BitRaser Bootable USB:
- Step 1: Post-purchase of BitRaser Drive Eraser software, you will receive an e-mail with your BitRaser Cloud Console credentials. Use the credentials to log in to your secure cloud account and download BitRaser Drive Eraser ISO from the ‘Download BitRaser’ section on the left panel. (Refer to Image 2)
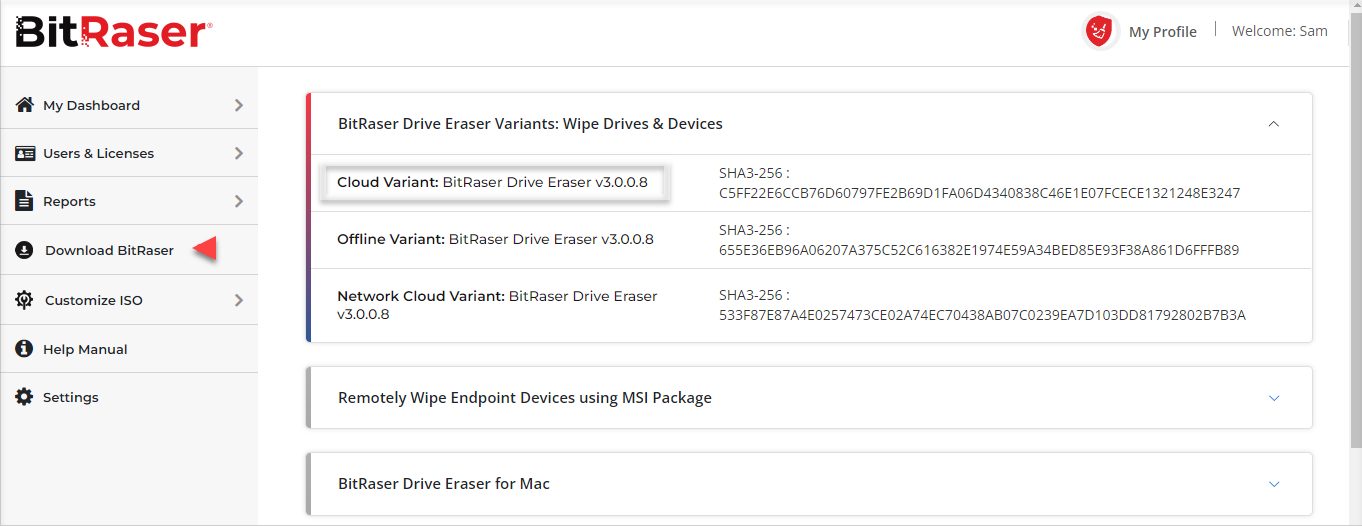
Image 2: Download BitRaser Drive Eraser ISO to Wipe SATA Drive
- Step 2: Download ‘Rufus,’ a free third-party Bootable USB creator utility. Connect the USB drive to your system and burn the downloaded BitRaser ISO file on the USB drive.
For step-by-step instructions on creating a bootable USB using Rufus, refer to our Knowledge Base article.
Wipe SATA Drives with BitRaser Drive Eraser
- Step 1: Connect the Bootable USB to the machine with SATA drives that must be wiped. ‘Power ON’ the device and go to the Boot Menu by pressing the relevant Function key (It may vary according to the device manufacturer).
Use the arrow keys to select the Bootable USB you created and press ‘Enter’. (Refer to Image 3)

Image 3: Dell Laptop Boot Menu Select USB, then Click Enter
Your device will boot with BitRaser and display the connected drives on the BitRaser Drive Eraser main screen. (Refer to Image 4)
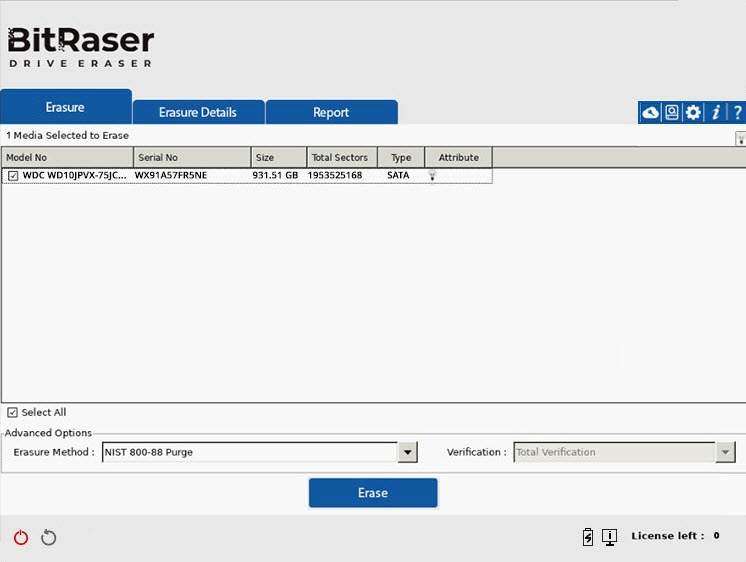
Image 4: BitRaser Drive Eraser Main Screen with Connected SATA Drive
- Step 2: Go to Settings > Network tab on the top right corner to connect the application to the internet using ‘Ethernet’ or ‘Wireless’. The application requires the internet to access ‘Erasure’ licenses and to communicate with the ‘BitRaser Server’. (Refer to Image 5)
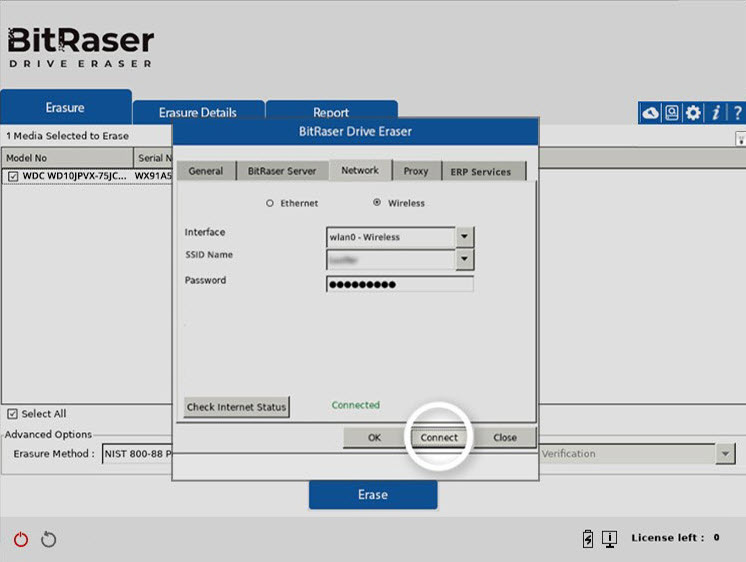
Image 5: Connect BitRaser Application to the Internet
- Step 3: Next, go to Settings > BitRaser Server and enter the login credentials received in the e-mail to establish a connection between the application and your BitRaser Cloud account. It facilitates the automatic transfer of erasure reports to your cloud account. Once connected, you can see the erasure licenses at the bottom right corner of the screen. (Refer to Image 6)
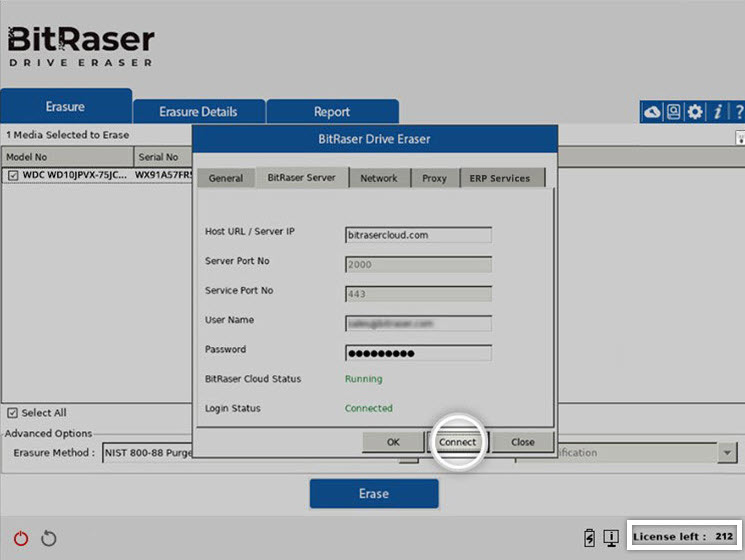
Image 6: Connect BitRaser Application to BitRaser Cloud Server
- Step 4: Next, choose the ‘Erasure Method’ you prefer for wiping the SATA drive, such as NIST Purge, US DoD 5220, or NIST Clear. Next, select the ‘Verification’ type, such as Total or Random Verification. Once you are ready, click the ‘Erase’ button.
You will see an alert window informing you that the process will erase data beyond the scope of recovery. Click on ‘Yes’ to confirm. (Refer to Image 7)
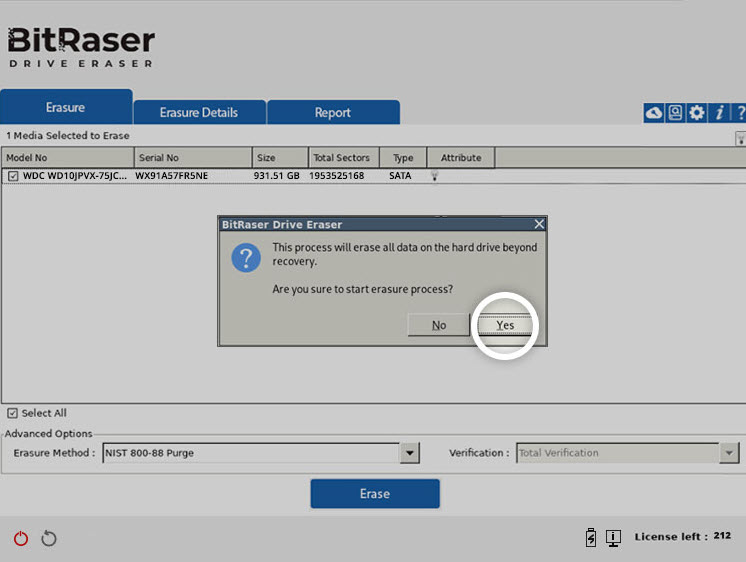
Image 7: Click Erase, then Click Yes in the Alert Window
The erasure process has begun, and you will be able to see the progress of the erasure on the BitRaser interface. (Refer to Image 8)
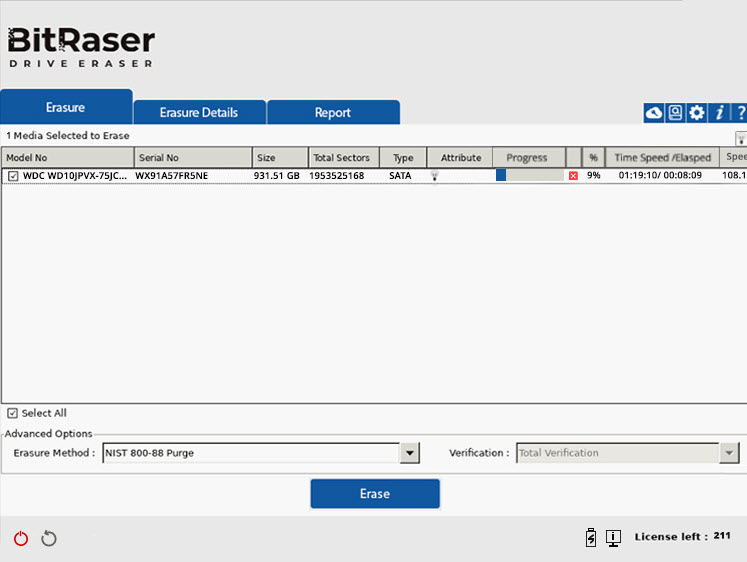
Image 8: SATA Drive Wiping Progress Screen
Once the process finishes, the software will automatically send a Report & Certificate of Erasure to your cloud account, which can be accessed anytime.


