The software performs a series of both automated and manual diagnostic tests, helping technicians understand the device's condition and decide whether it needs repair or replacement. The Chromebook diagnostics process is divided into three stages.
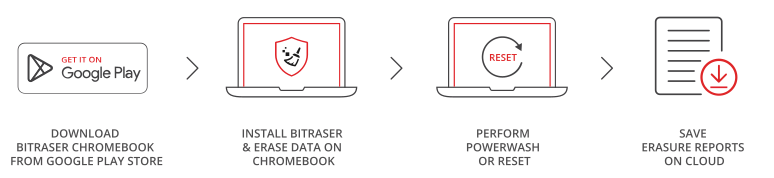
Before starting device enrollment, ensure that the Chromebook has been set up using the enrollment credentials provided by the BitRaser team. If the Chromebook is new or has not been enrolled, perform a powerwash/factory reset first. Then, sign in using the provided credentials to begin the enrollment process. It is important to enroll the Chromebook under your organization’s Google Admin Console. This grants BitRaser the permissions needed to retrieve accurate hardware information (e.g., serial or model number) and enables automatic execution of the Powerwash process for complete data sanitization.
-
Step 1: Power ‘On’ your Chromebook device and click the ‘Get Started’ button (See Image 1).

Image 1: Chromebook Welcome Screen
-
Step 2: Connect the device to the internet and click ‘Next’ to continue. Once connected, you will see the ‘Choose your Chromebook’s setup’ screen. Go to the bottom and select ‘Device enrollment’ (See Image 2).

Image 2: Chromebook Setup Screen
-
Step 3: Enter the enrollment credentials sent by BitRaser team, such as ‘Email Address’ and ‘Password’ to begin the enrollment process. Then, click ‘Enroll Enterprise Device’ (See Images 3a & 3b).

Image 3a: Chromebook Device Enrollment Login Screen

Image 3b: Chromebook Device Enrollment Password Window
Once your credentials are validated, the ‘Enterprise Enrollment’ process will be completed. Click ‘Done’ to continue (See Image 4).

Image 4: Enterprise Enrollment Complete
-
Step 4: After enrolling your device, you will be redirected to the ‘Sign in to your Chromebook’ screen. First, enter your email ID and click ‘Next’ (See Image 5a). Then, enter ‘Password’ and click ‘Next’ (See Image 5b).
Note: You can sign in using either the provided email address or a personal email address. However, using the provided email address is recommended.

Image 5a: Sign in to your Chromebook screen

Image 5b: Password Authentication Screen
The BitRaser Drive Eraser & Diagnostics for Chromebook will automatically open in the ‘Component Test’ tab. From here, you can navigate through the available tabs and settings to run hardware diagnostics, configure diagnostics settings, and access detailed reports.
-
Step 1: To start the Chromebook diagnostics process, enter your ‘Username’ & ‘Password’ to access the ‘BitRaser Cloud Console’ (See Image 8).
Note: The cloud credentials are sent to you via email. The server URL is set to bitrasercloud.com by default and cannot be changed.

Image 8: BitRaser Drive Eraser & Diagnostics for Chromebook Server Tab
Once the credentials are entered, the application automatically connects with BitRaser Cloud. You will now see the main screen of the BitRaser Drive Eraser & Diagnostics for the Chromebook application (See Image 9).
Note: If you only want to perform diagnostics on the Chromebook, you can skip the erasure process.

Image 9: Component Test Tab
Go to ‘Settings’ and click ‘Diagnostics’ in the BitRaser Drive Eraser & Diagnostics for Chromebook dialog box to customize the tests (See Image 10). You can check or uncheck the boxes to choose which hardware components you want to diagnose then click ‘Save’ to apply the changes. You must select at least one test to perform the ‘Component Test’.

Image 10: BitRaser Diagnostics Tab for Chromebook
-
Step 2: Click ‘Start’ to begin the diagnostics process. The software will first perform auto tests: Accelerometer Sensor, Gravity Sensor, Gyroscope Sensor, Magnetometer Sensor, Orientation Sensor, CPU, Memory, Battery, and Storage (See Image 11).

Image 11: Auto Test
As soon as the automatic test finishes, the ‘Manual Test’ will start. Here, users need to manually perform tests to diagnose components, such as display, webcam, multitouch, touchscreen, audio, microphone, Bluetooth, Wi-Fi, keyboard, ports, and touchpad test. Then, select the accessories & grade the Chromebook based on the visual condition.
-
Step 3: You will see the first test: ‘Display Test.’ Click ‘Start’ to begin the process. This will check the monitor’s ability to identify different colors, such as yellow, pink, blue, red, green, and black (See Image 12a).

Image 12a: Display Test
A pop-up window will prompt you with the message “Is Display working properly?” Click ‘Yes’ or ‘No’ based on the test result (See Image 12b).
Note: After each manual test, select ‘Yes’ or ‘No’ to confirm whether the hardware component is functioning properly or not. You can click ‘Try Again’ to re-test the device component.

Image 12b: Display Working Properly Confirmation Window
-
Step 4: Next, the application will perform the ‘Webcam Test.' The camera will open automatically and capture an image. The captured image will appear on the screen with the prompt, “Is Webcam working properly?” Click ‘Yes’ if the camera is functioning correctly, or ‘No’ if it is not (See Image 13).
Note: Camera permission is required for this test. When prompted, select ‘While using the app’ or ‘Only this time’ to allow access. Selecting ‘Don’t allow’ will cause the test to fail.

Image 13: Webcam Test
-
Step 5: The ‘Multitouch Test’ will start with a blank black screen. Place three or more fingers on the touchpad to perform the test (See Image 14).
Note: Use at least three or more fingers. The test will fail if you use only two fingers.

Image 14: Multitouch Test
-
Step 6: In the ‘Touchscreen Test’, touch the blue grid pattern on the screen. Each area you touch will turn 'White', allowing you to verify the touchscreen’s responsiveness (See Image 15).

Image 15: Touchscreen Test
-
Step 7: Next, the ‘Audio Test’ starts automatically to test the device’s audio output (See Image 16).

Image 16: Audio Test
-
Step 8: When the ‘Microphone Test’ starts, a speaker icon appears and records the audio. The recorded audio then plays back to verify the microphone’s functionality (See Images 17a & 17b).

Image 17a: Microphone Test Recording Start

Image 17b: Microphone Test Playing Recording
-
Step 9: The ‘Bluetooth’ and ‘Wi-Fi’ tests run automatically. The software detects nearby Bluetooth devices and displays a list of available Wi-Fi connections (See Images 18a & 18b).
Note: Both tests require access to connect to nearby Bluetooth devices and available Wi-Fi networks.

Image 18a: Bluetooth Test

Image 18b: Wi-Fi Test
-
Step 10: The ‘Keyboard Test’ checks whether all keys are functioning properly. Press each key until it turns blue. Then, click ‘Next’ and verify the results displayed on the screen (See Image 19).

Image 19: Keyboard Test
-
Step 11: Next, the software runs the ‘Ports Test’ to verify the functionality of the AUX port. If the port is functioning properly, its corresponding image will turn blue (See Image 20).
Note: The ‘Ports Test’ supports the AUX port only.

Image 20: Ports Test
-
Step 12: The ‘Touchpad Test’ starts automatically. Click the left and right buttons and move your finger across the touchpad to verify that all areas are functioning properly. Once done, click ‘Yes’ or ‘No’ in response to the prompt, ‘Is your Touchpad working properly?’ (See Image 21).

Image 21: Touchpad Test
-
Step 13: The next screen prompts you to verify accessories such as the ‘Charger’ and ‘Packaging.’ You can grade the device’s body, display, and overall condition using A+, A, B+, B, C+, or C grades (See Image 22a).
Note: You can also add remarks about the accessories and device grading in the ‘Remark’ field.

Image 22a: Accessories and Grading
-
Step 14: When you click 'Save,' a pop-up displays a message indicating, “All selected tests completed. If you wish, you can re-run the manual tests” (See Image 22b).

Image 22b: Manual Test Completed Dialog
You will then return to the ‘Component Test’ tab, where a blue tick indicates that the hardware tests have been completed successfully. Click ‘Submit’ to send the diagnostic report to BitRaser Cloud (See Images 23a & 23b).

Image 23a: Manual Test Results Screen

Image 23b: Diagnostics Report Sent Confirmation Dialog
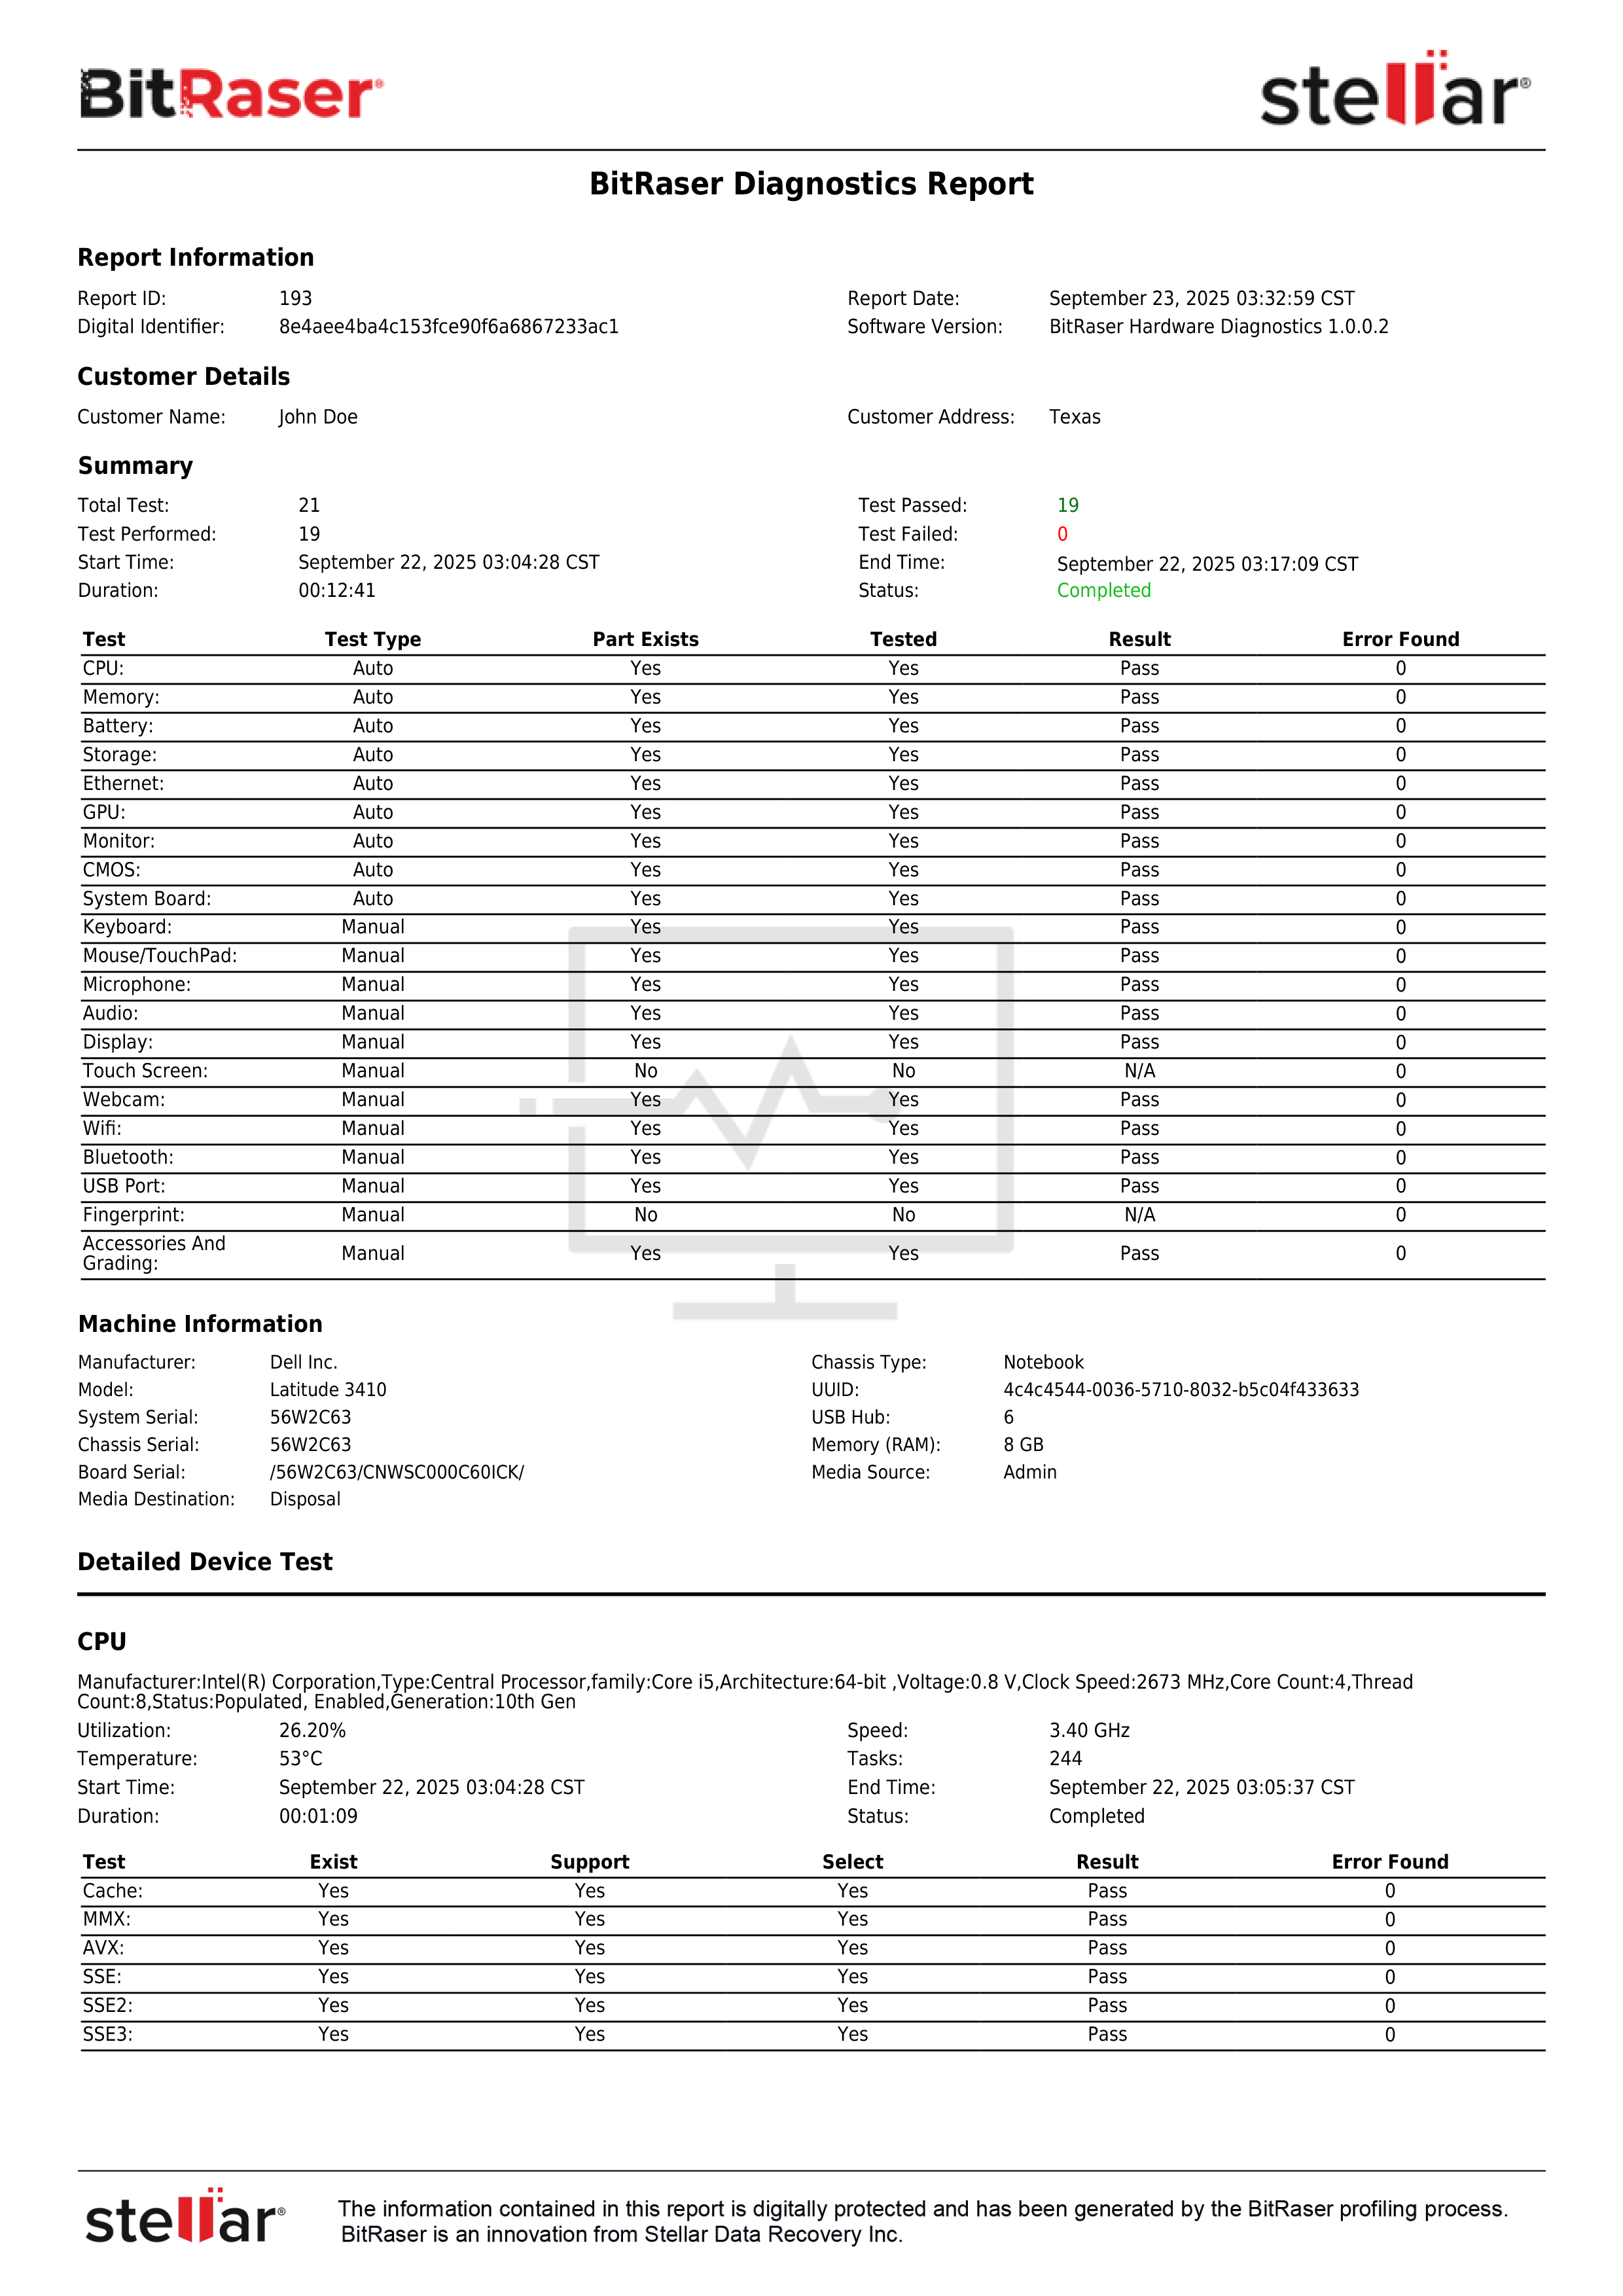
Now, you have successfully tested all hardware components of your Chromebook device. The detailed hardware diagnostic report is automatically saved in your BitRaser Cloud Console (See the Report below).

BitRaser Chromebook Diagnostics Report